Search
  • HOME
  • ABOUT ME
  • ARTICLES
Close
Menu
Search
Close
  • HOME
  • ABOUT ME
  • ARTICLES
Menu

Nina Knows Food

EXPLORE. EAT. DRINK. REPEAT.

November 26, 2020

My First Self-Published Cookbook!

by Nina Z


fullsizeoutput_1e9f.jpeg

2020 has been challenging, stressful, upsetting, disappointing… all the things! And in the back of my mind, in addition to the swirling thoughts of living through a global pandemic, I was wondering: when is the right time to get this cookbook out into the universe?

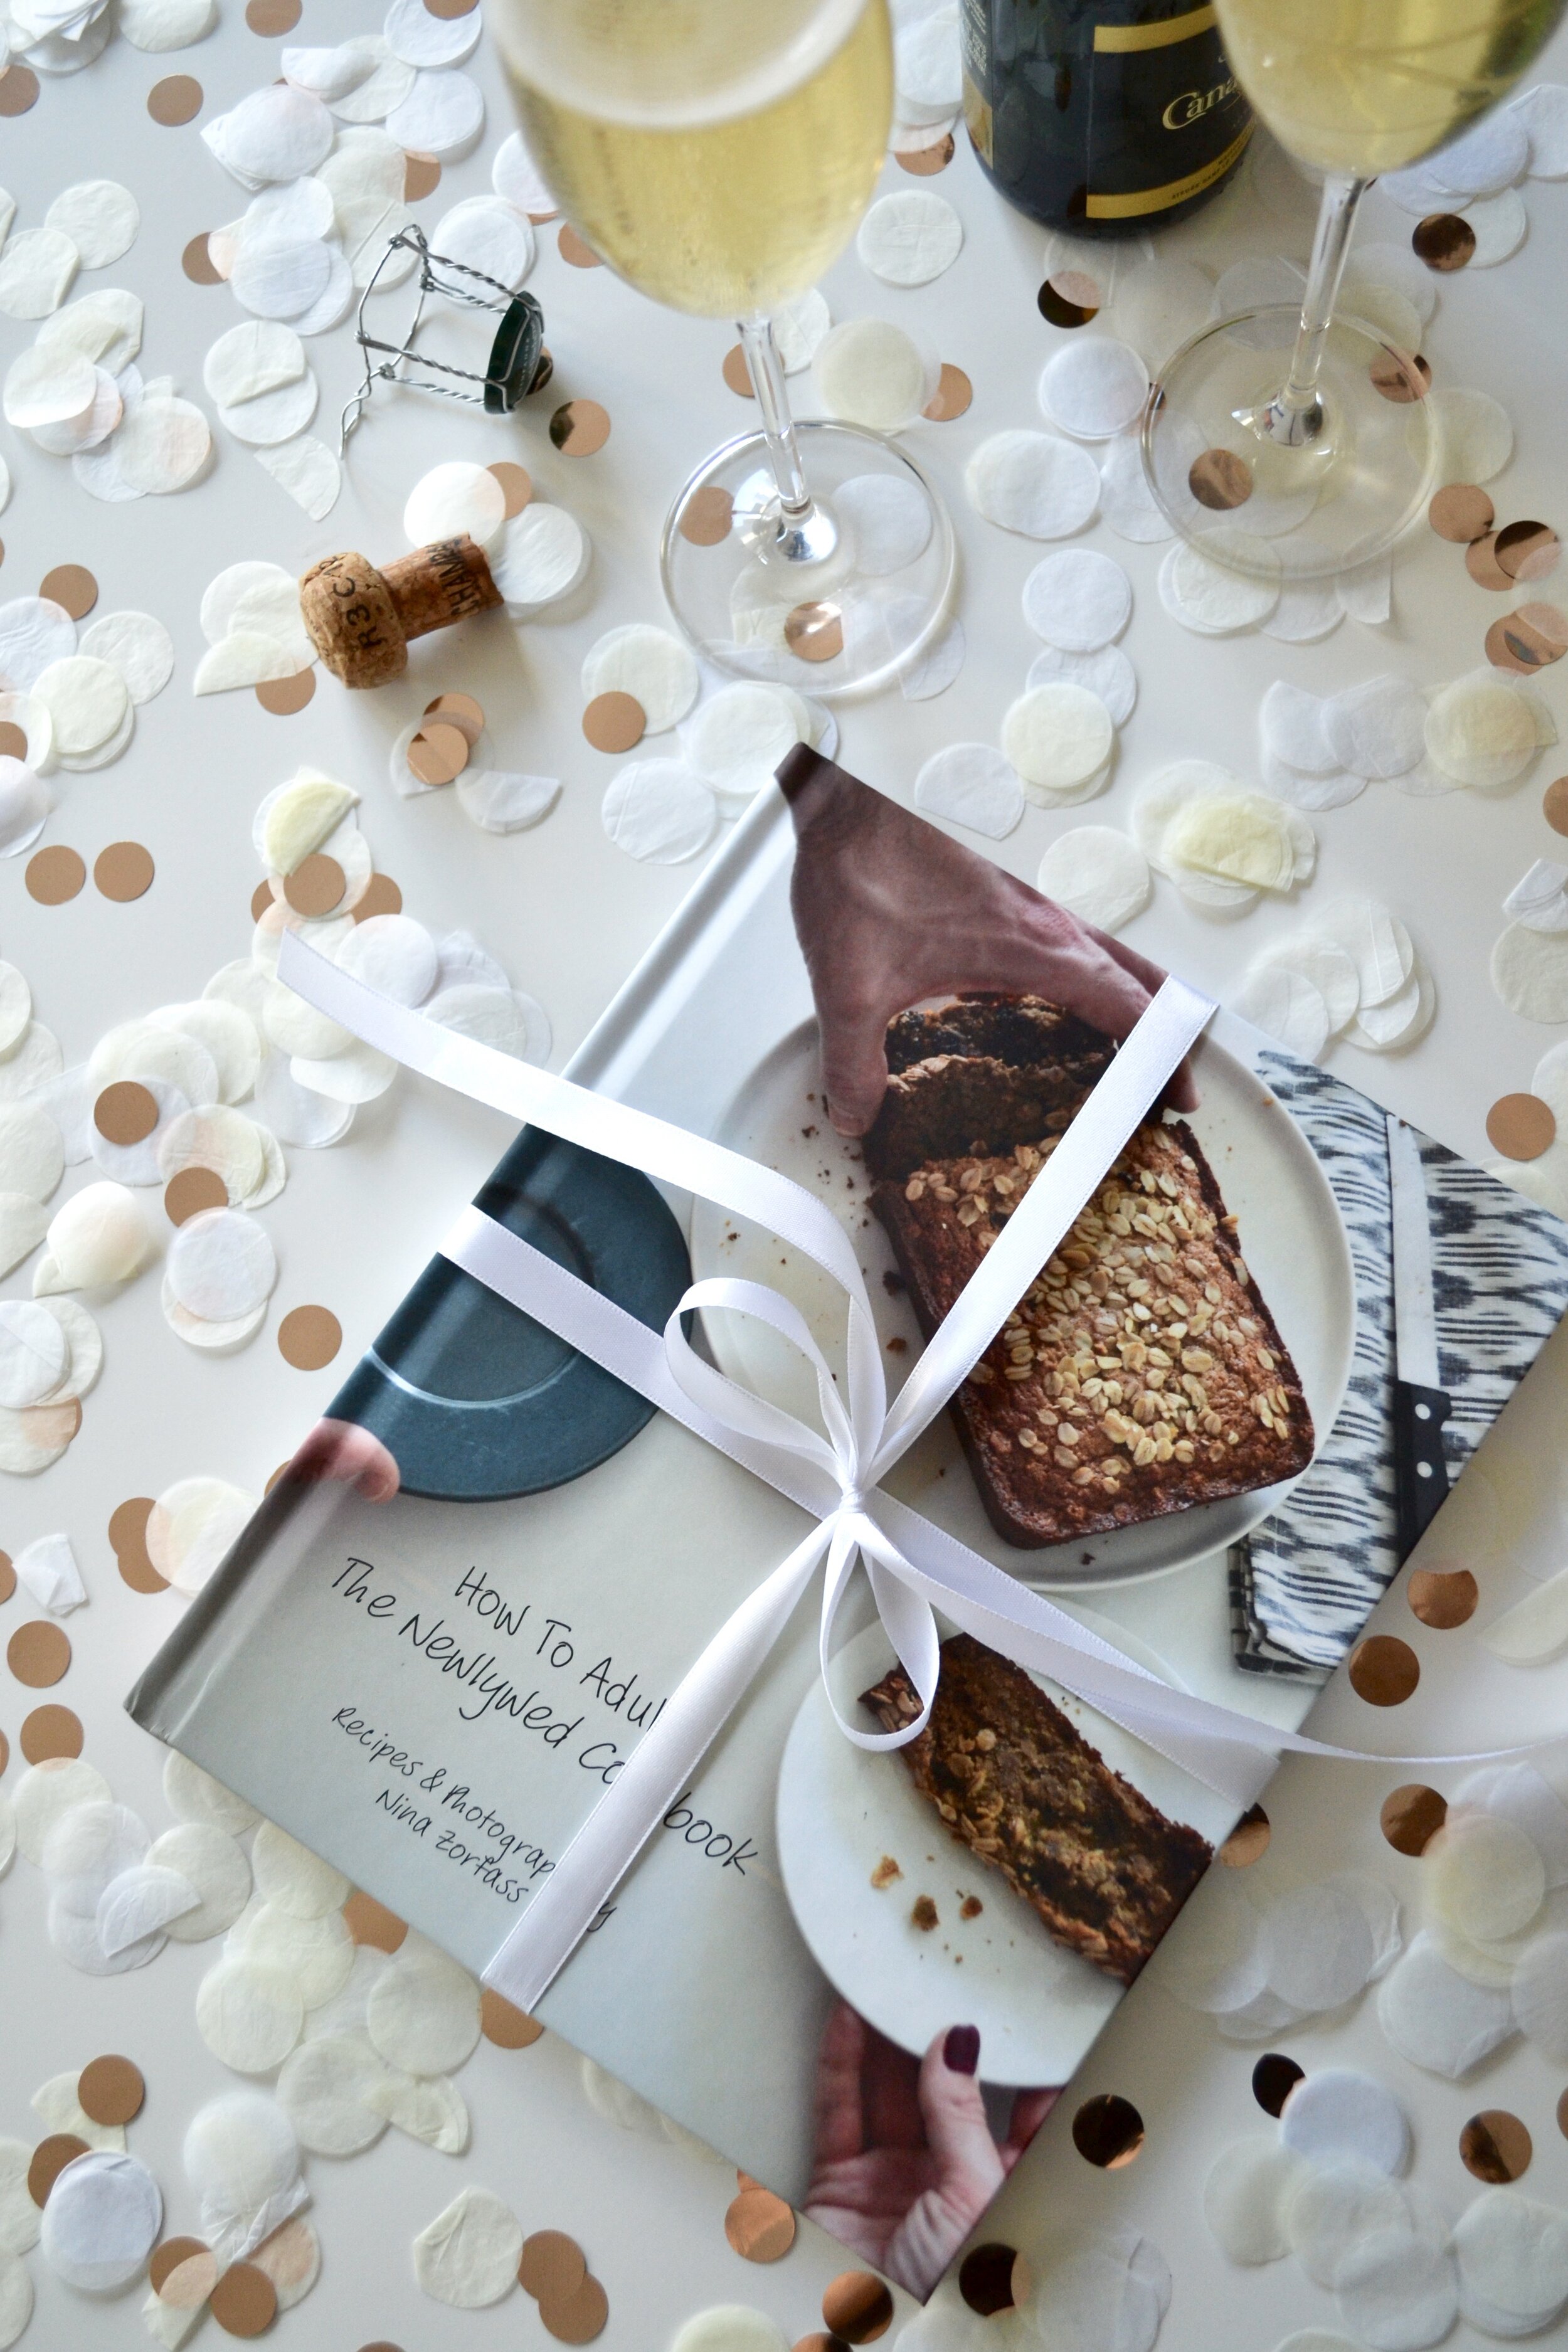
What a lot of us have learned this year is that maybe there is no “right” time for anything, but now felt as right as ever to share this passion project that has been a LONG time coming. After 2+ years of talking, thinking, cooking, eating, baking, re-working recipes, taking photos, and writing/assembling, it’s finally available for everyone!:

How to Adult: The Newlywed Cookbook ©

fullsizeoutput_1ea1.jpeg

This concept came to life when I made the original version of this cookbook as a wedding gift for close friends. I quickly realized that it would make a wonderful, unique off-the-registry gift for any newlyweds! One of the things I love most about food and cooking is how it brings people together - you can learn a lot about a person by the way they operate in the kitchen!

Cooking is also something that I feel many people, like my fellow millennials, either love or hate with no in-between. I want to change that! We love to joke - and complain - about everything that “adulting” requires of us, such as taking care of ourselves on a daily basis. This book’s collection of recipes was curated to demonstrate that cooking doesn’t need to be complicated or take a long time to be delicious (and healthy!).

From meal prep ideas to sweet treats, this book is a great gift for the novice who loves to follow recipes to the letter, as well as for the seasoned cook who loves to improvise.

You can buy How to Adult: The Newlywed Cookbook © here!

*Through December 31, 2020, $10 from every book purchased will be donated to Full Heart Full Bellies, an organization in the Bronx (NYC) feeding food insecure children and those impacted by COVID-19.
Comment

TAGS: cookbook, howtoadultcookbook, meal prep, healthy meals, weekdaymeals, cooking


September 22, 2019

Chocolate Chip Banana Bread

by Nina Z


fullsizeoutput_1e8a.jpeg

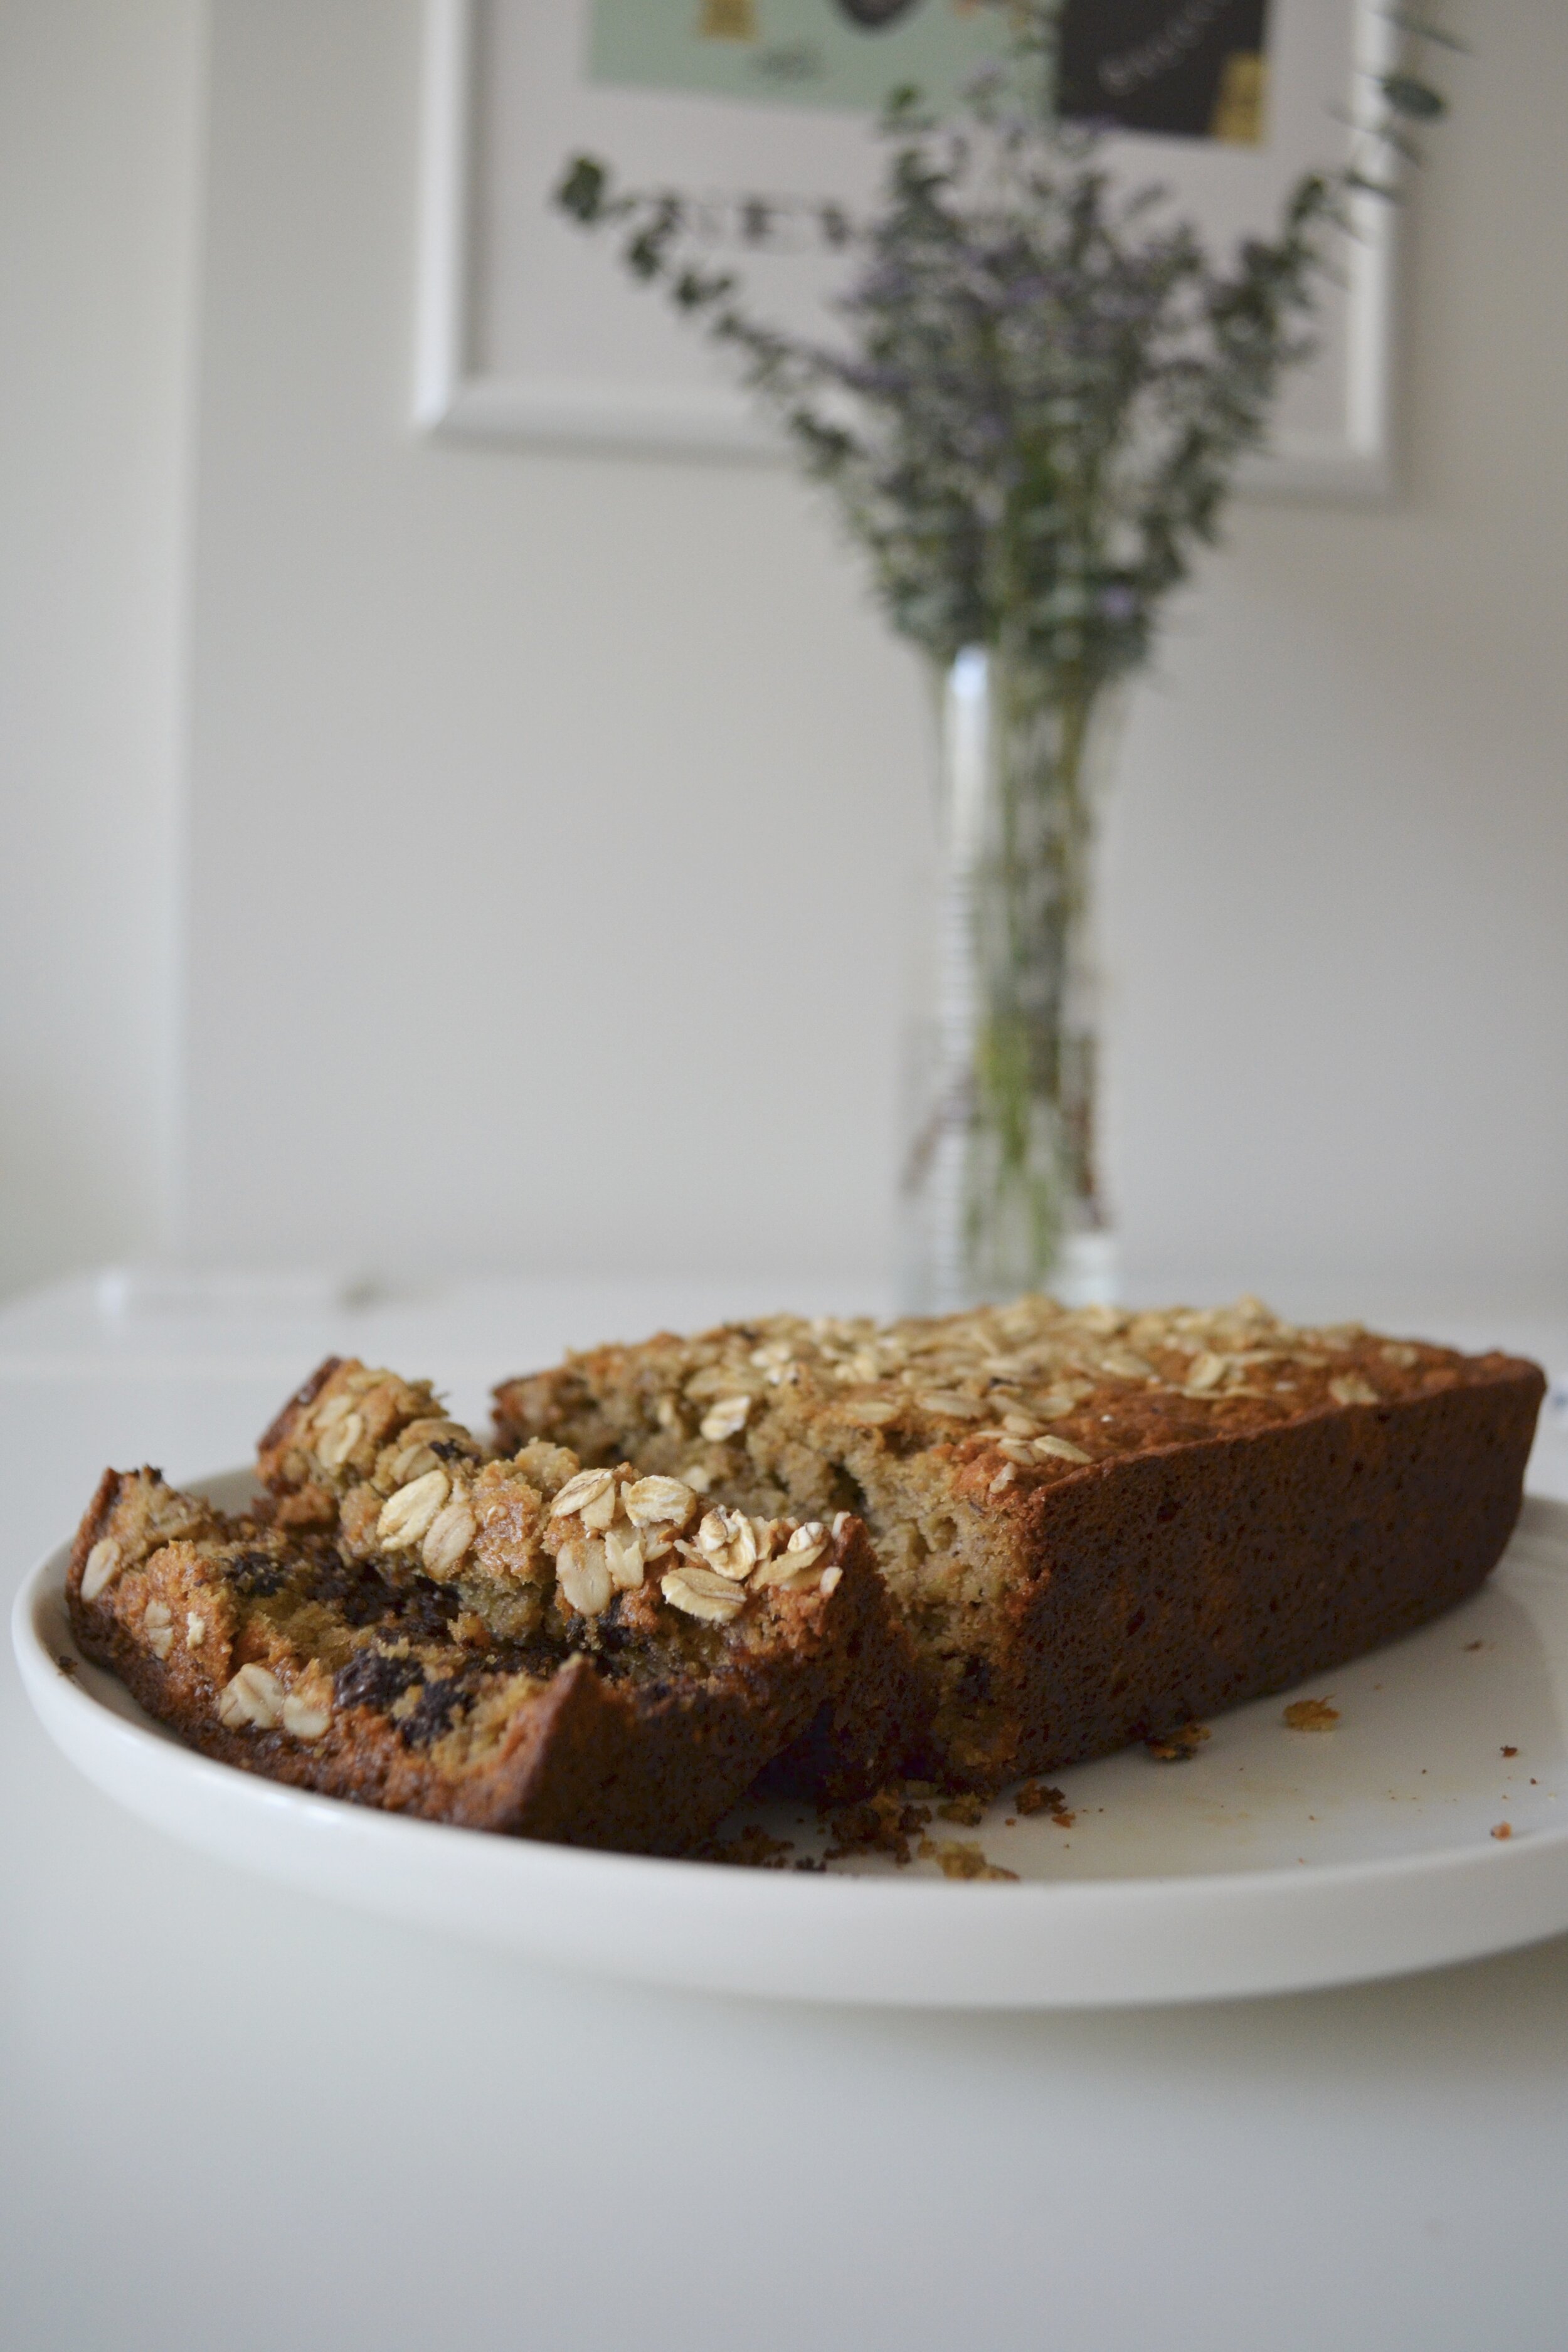
Banana bread is one of my all-time favorite treats. I like my banana bread to eat more like a cake, rather than bread - makes it feel so much more indulgent - and I hope you feel the same way.

And, it’s dairy-free and gluten-free.

AND, it’s been taste-tested and approved by hungry brunch friends.

ANNND, I’ve decided to add this to the cookbook. Yep, I’m that generous.

Here’s what you’ll need to make this chocolate chip banana bread:

  • 1/3 cup melted coconut oil + a little extra to grease bread tin

  • 1/4 cup maple syrup

  • 2 eggs

  • 3-4 medium-sized very ripe bananas, mashed

  • 1/4 cup almond milk (or milk of choice)

  • 1 tsp baking soda

  • 1 tsp vanilla extract

  • 1/2 tsp salt

  • 1/2 tsp cinnamon

  • 1 cup almond flour

  • 3/4 cup oat flour

  • 1/3 cup old-fashioned oats (not quick cook), plus more to sprinkle on top

  • 1/4-1/3 cup dark chocolate chips (or chocolate chips of your choice)

Preheat oven to 350 degrees F. Grease a bread tin with enough coconut oil to coat the entire tin, including the sides! I usually melt about a teaspoon of coconut oil, pour into the tin, and spread with a paper towel.

In a large bowl, whisk melted coconut oil and maple syrup until combined. Add eggs, and whisk again until combined. Add in bananas, milk, baking soda, vanilla, salt, and cinnamon, and whisk until completely combined.

Add almond and oat flours, as well as oats, and using a spatula, carefully fold mixture together until all ingredients are incorporated. Add in chocolate chips, and fold again with a spatula until the chips are dispersed throughout the mixture evenly.

Pour batter into the greased bread tin. Even out the top with the spatula and bang the tin (gently) on the counter a couple of times to release any air bubbles. Sprinkle the top with some extra oats.

Bake at 350F for 40-45 minutes, until the middle is set and a toothpick/knife dipped in comes out clean. The edges of the bread will brown before the middle, so don’t worry. Let bread cool slightly before taking out of the bread tin.

Comment

TAGS: ninaknowsfood, banana bread, healthytreat, dessert, breakfast, brunch, gluten-free, dairy-free, howtoadultcookbook, cookbook, baking


September 4, 2019

UPDATED: Spicy Beef Ragu

by Nina Z


fullsizeoutput_1e87.jpeg

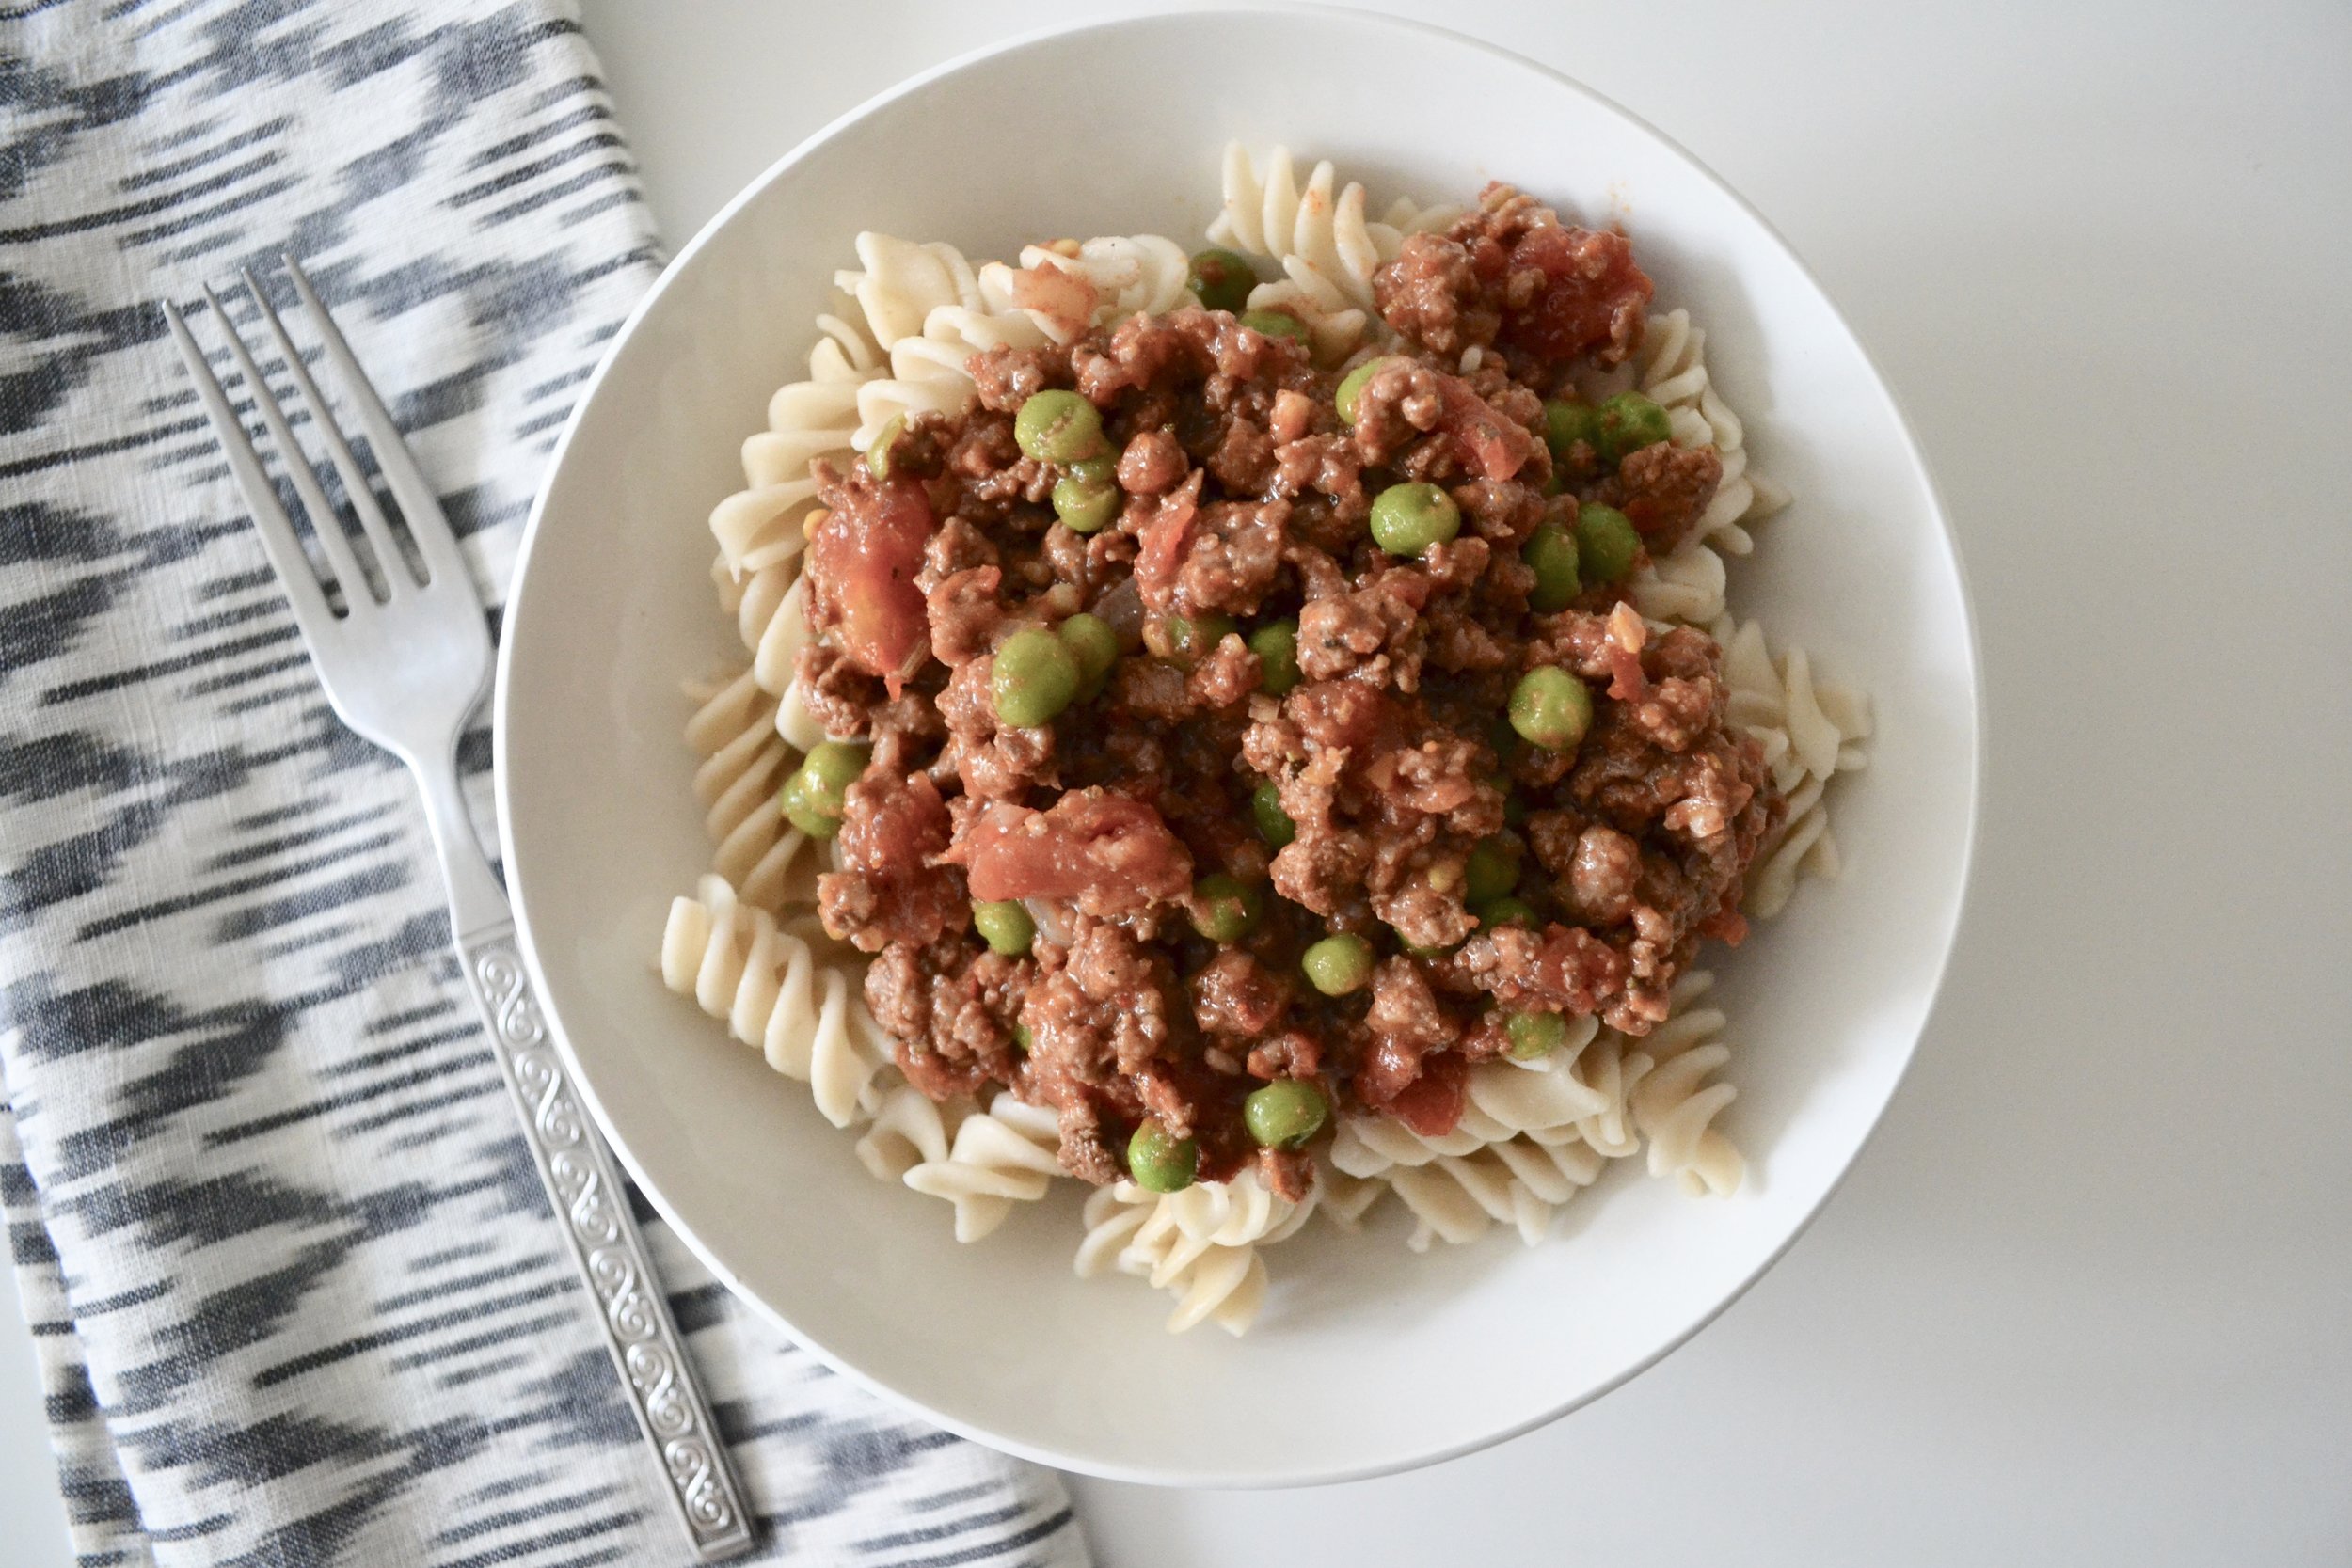
Great recipes lend themselves to dishes that end up almost exactly the same each time. That’s my goal with the #howtoadultcookbook - to provide recipes that can be relied upon time and time again to create delicious meals.

In order to make that a reality, I’ve revisited every recipe in the book and made it again, and in the process, have adjusted some recipes, whether its ingredient amounts, cooking time, or cooking method(s). My hope is that you can depend on these recipes, while also making them your own in your own kitchens, in true #ninaknowsfood form.

Here’s the updated spicy ragu recipe:

  • 2 TBS olive oil (for cooking)

  • 2 large cloves garlic, finely diced

  • 1 large shallot, finely diced

  • 1 lb ground beef (80/20 or 90/10)

  • 1/2 TBS red chili flakes

  • 2 tsp whole fennel seeds

  • 2 tsp ground Italian seasoning

  • 1 tsp ground smoked paprika

  • 1/4 cup white wine of your choice

  • 1 14oz can unseasoned diced tomatoes

  • 1/4 cup water

  • Salt & pepper to taste

  • 1/2 cup frozen peas

In a large sauté pan over low-medium heat, heat olive oil until shimmering. Add garlic and shallot, and cook until softened, about 2-3 minutes.

Add ground beef and cook until just browned. As meat is browning, add in red chili flakes, fennel seeds, Italian seasoning, and s&p. Stir to combine. If there's a lot of fat in the pan, remove with a spoon.

Once beef is browned, add in white wine and let liquid reduce by half. Once liquid reduces, add in diced tomatoes and water. Stir to combine completely.

Lower heat to low, cover, and allow ragu to simmer for 20 minutes.

When done simmering, turn off heat and take the pan off the hot burner. Add in frozen peas and stir to combine. The peas will thaw almost immediately.

Serve hot or let ragu cool completely before storing in the fridge or freezer.

Comment

TAGS: ninaknowsfood, howtoadultcookbook, cookbook, weeknightmeals, mealprep, meal prep, healthy meals, pasta, dinner


June 21, 2017

No change, no growth.

by Nina Z


You may have heard the saying, hindsight is 20/20. And of course, it wouldn't be so clear if you didn't have time to reflect on it afterwards. That's exactly what I've been doing these past few months - reflecting - and ready to tackle whatever comes my way.

Let me start at the end of the story: the trip of a lifetime, the trip to cap off the first half of my year that had quite a few bumps in the road. SurfYogaBeer, you gave me exactly what I needed at exactly the right time - the universe is funny that way, you know? Amazing food, amazing views, and even more amazing people contributed to a blissed-out week where I was more present in every moment than I had been in months.

IMG_6475.JPG

Now, back to the real world, where I'm dealing with the ever-present reality of Saturn's return. Yep, Saturn's return, the period of time leading up to when Saturn returns to the same position it was on the day you were born. This period of time marks major transition as you move in to the next phase of your life. Think I'm crazy? Look it up!

What else has changed? A new job, a new apartment... just to name a couple. You may be thinking, Nina this is so much change at once! I don't disagree. It's a TON actually. If I've learned anything over the last few years, it's to be patient with myself, especially during these times of change. I tend to be very impatient and I often have to remind myself that it's going to take time. But I also remind myself that this is such an exciting time, with lots of beautiful and positive things to come.

So what remains true and consistent? My desire to keep up with this blog, and my love for cooking (of course). I've had to start meal prepping to bring lunch to my new job, which has been challenging but has allowed me to get more creative in the kitchen. I've been inspired by Food52's one-pot meals, like these curried coconut lentils. OH MY GOD, YUM. (Note: I added frozen peas and walnuts to mine). Meal prep has also allowed me to have a quick dinner without having to start cooking as soon as I get home. Win-win.

Oh, another thing that's going on? My dream of writing a COOKBOOK with my kickass friend Ilana is FINALLY COMING TRUE.

HELL YEAH, A COOKBOOK. A cookbook for us - the millenials - the ones realizing how incredibly valuable home cooking is and how important it is to have some basic skills, and absolutely delicious recipes, under our belts. We've been thinking about this for years and it's finally starting to happen. We only ask that you remain patient, as we're only at the beginning of planning, which happens to be the most fun... recipe development!

You wanna help test out recipes? Get in line.

Just kidding, there is no line. (Or is there?)

To give you a little taste of what's to come (see what I did there?), I'm going to share an exclusive cookbook recipe with y'all! 

Here's what you'll need to make GRAB-n-GO Protein Balls (makes 10-12, two-bite balls):

  • 1 large banana, mashed
  • ⅓ cup almond butter or peanut butter
  • ¾ cup rolled oats (not quick cook!)
  • 1 TBS maple syrup
  • 1 TBS hemp seeds
  • ½ tsp cinnamon
  • 1 TBS dried goji berries (or cranberries, or blueberries)
  • 1 TBS semi sweet or dark chocolate chips, slightly chopped (leave some full pieces)
  • 1 ½ TBS unsweetened coconut flakes (mix in) + 1 cup flakes (reserved for rolling)
  • Pinch of sea salt

Combine all ingredients in mixing bowl. Set aside baking sheet lined with parchment paper.

On a large plate, pour 1 cup of unsweetened coconut flakes. Using a spoon, scoop mixture and roll into 1-inch balls (about 1 TBS worth of mixture). Coat each protein ball with coconut flakes and place on baking sheet. Repeat until mixture is gone.

Refrigerate protein balls for at least 30 minutes; overnight is best. You can also freeze; the texture/consistency won't change that much! Store in an airtight container - will last 3-5 days in the fridge, 1-2 weeks in the freezer.

This is THE perfect snack to grab if you're running late to work, or to pop right before a spin class. Or, just-because you're hungry and want something packed with protein, fiber, and healthier sugars. 

It's good to be back, in more ways than one. Ciao (for now)!

Comment

TAGS: ninaknowsfood, travel, italy, surfyogabeer, mealprep, cooking, cookbook, vegan, dairy-free, snack, healthytreat, balance, howtoadultcookbook, recipedevelopment, recipetesting, weeknightmeals


Powered by Squarespace 6