Search
  • HOME
  • ABOUT ME
  • ARTICLES
Close
Menu
Search
Close
  • HOME
  • ABOUT ME
  • ARTICLES
Menu

Nina Knows Food

EXPLORE. EAT. DRINK. REPEAT.

January 5, 2020

PB&J Baked Oatmeal

by Nina Z


IMG-1706.jpg
IMG-1706.jpg
IMG-1697.jpg

I don’t like going out for brunch, but I love to cook brunch. It’s easier to make than dinner, especially for a crowd, and consists of lots of fridge and pantry staples you like already have on hand.

One such staple: oats. Add ‘em to banana bread, soak ‘em for overnight oats, or make baked oatmeal, an unfussy brunch dish that looks super impressive… it’s basically oatmeal that you bake and cut into squares.

I’m a sucker for anything peanut butter and jelly flavored, so this seemed like the perfect way to experiment with these flavors I love so much.

Here’s what you need to make PB&J Baked Oatmeal - makes 9 ½-cup servings:

  • 2 cups rolled oats (not quick-cook)

  • ½ cup unsweetened shredded coconut

  • 1 ½ tsp ground cinnamon

  • 1 tsp baking powder

  • ½ tsp salt

  • 2 cups almond milk

  • 1 egg

  • 2 TBS melted coconut oil + 1 heaping tsp for greasing baking dish

  • 2 tsp vanilla extract

  • Smooth peanut butter

  • Jam of your choice (I went with raspberry)

Preheat oven to 375 degrees F. Grease an 8x8” baking dish with coconut oil and set aside.

Mix dry ingredients - oats, coconut, cinnamon, baking powder and salt - in a large mixing bowl. Add in wet ingredients - milk, egg, coconut oil and vanilla - and use a whisk to thoroughly combine.

Pour oat mixture into the baking dish and tap dish gently on the counter to evenly distribute the oat mixture. Using a spoon, spoon 9 dollops of jam - about 1 tsp jam each - evenly on top of the oats (3 x 3). Then spoon 9 dollops of peanut butter - about 1 tsp peanut butter each - evenly on top of the oats and swirl together gently (see picture above for reference).

Bake for 35-40 minutes, until golden brown on top and the edges are a little crispy. Serve hot. If making in advance, cook for 30-35 minutes, and put back into a 350-375 degree oven for 5-10 minutes before ready to serve.

Serves 5-6 hungry brunch guests.

Comment

TAGS: ninaknowsfood, brunch, homemade, baked oatmeal, oatmeal, oats, howtoadultcookbook, dairy-free, sundays, weekends, gluten-free, recipedevelopment, healthy meals


September 22, 2019

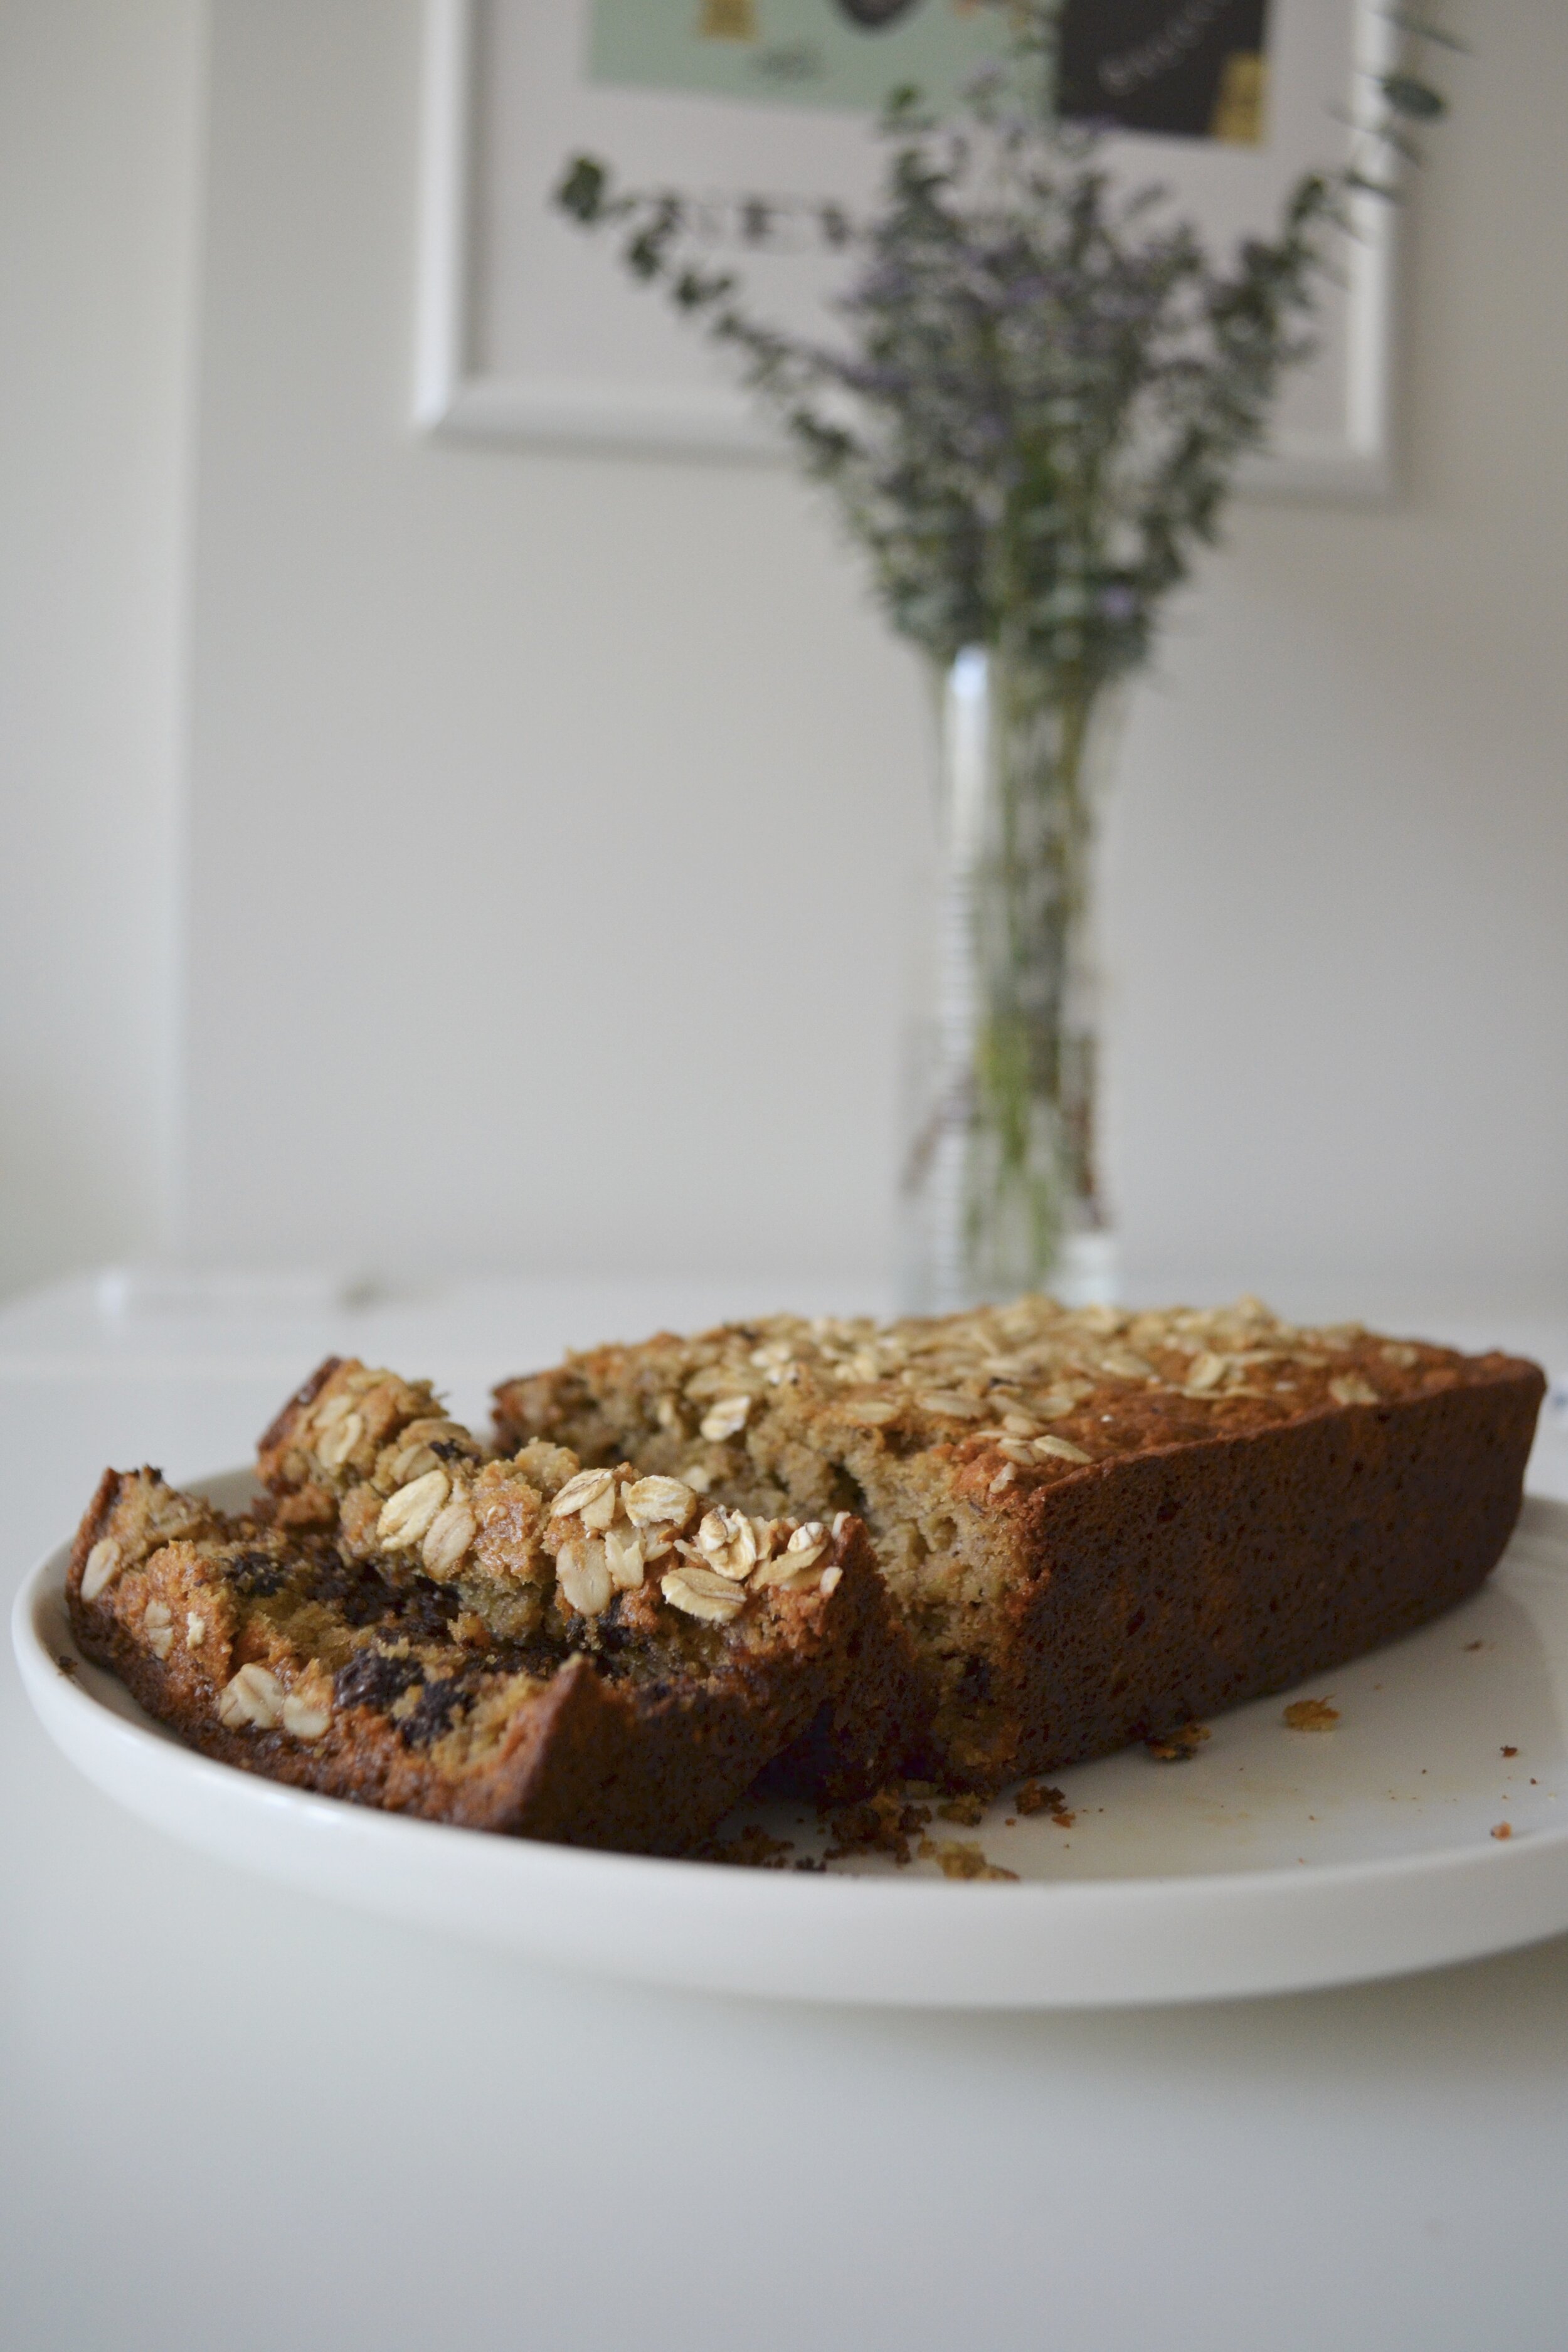
Chocolate Chip Banana Bread

by Nina Z


fullsizeoutput_1e8a.jpeg

Banana bread is one of my all-time favorite treats. I like my banana bread to eat more like a cake, rather than bread - makes it feel so much more indulgent - and I hope you feel the same way.

And, it’s dairy-free and gluten-free.

AND, it’s been taste-tested and approved by hungry brunch friends.

ANNND, I’ve decided to add this to the cookbook. Yep, I’m that generous.

Here’s what you’ll need to make this chocolate chip banana bread:

  • 1/3 cup melted coconut oil + a little extra to grease bread tin

  • 1/4 cup maple syrup

  • 2 eggs

  • 3-4 medium-sized very ripe bananas, mashed

  • 1/4 cup almond milk (or milk of choice)

  • 1 tsp baking soda

  • 1 tsp vanilla extract

  • 1/2 tsp salt

  • 1/2 tsp cinnamon

  • 1 cup almond flour

  • 3/4 cup oat flour

  • 1/3 cup old-fashioned oats (not quick cook), plus more to sprinkle on top

  • 1/4-1/3 cup dark chocolate chips (or chocolate chips of your choice)

Preheat oven to 350 degrees F. Grease a bread tin with enough coconut oil to coat the entire tin, including the sides! I usually melt about a teaspoon of coconut oil, pour into the tin, and spread with a paper towel.

In a large bowl, whisk melted coconut oil and maple syrup until combined. Add eggs, and whisk again until combined. Add in bananas, milk, baking soda, vanilla, salt, and cinnamon, and whisk until completely combined.

Add almond and oat flours, as well as oats, and using a spatula, carefully fold mixture together until all ingredients are incorporated. Add in chocolate chips, and fold again with a spatula until the chips are dispersed throughout the mixture evenly.

Pour batter into the greased bread tin. Even out the top with the spatula and bang the tin (gently) on the counter a couple of times to release any air bubbles. Sprinkle the top with some extra oats.

Bake at 350F for 40-45 minutes, until the middle is set and a toothpick/knife dipped in comes out clean. The edges of the bread will brown before the middle, so don’t worry. Let bread cool slightly before taking out of the bread tin.

Comment

TAGS: ninaknowsfood, banana bread, healthytreat, dessert, breakfast, brunch, gluten-free, dairy-free, howtoadultcookbook, cookbook, baking


August 21, 2019

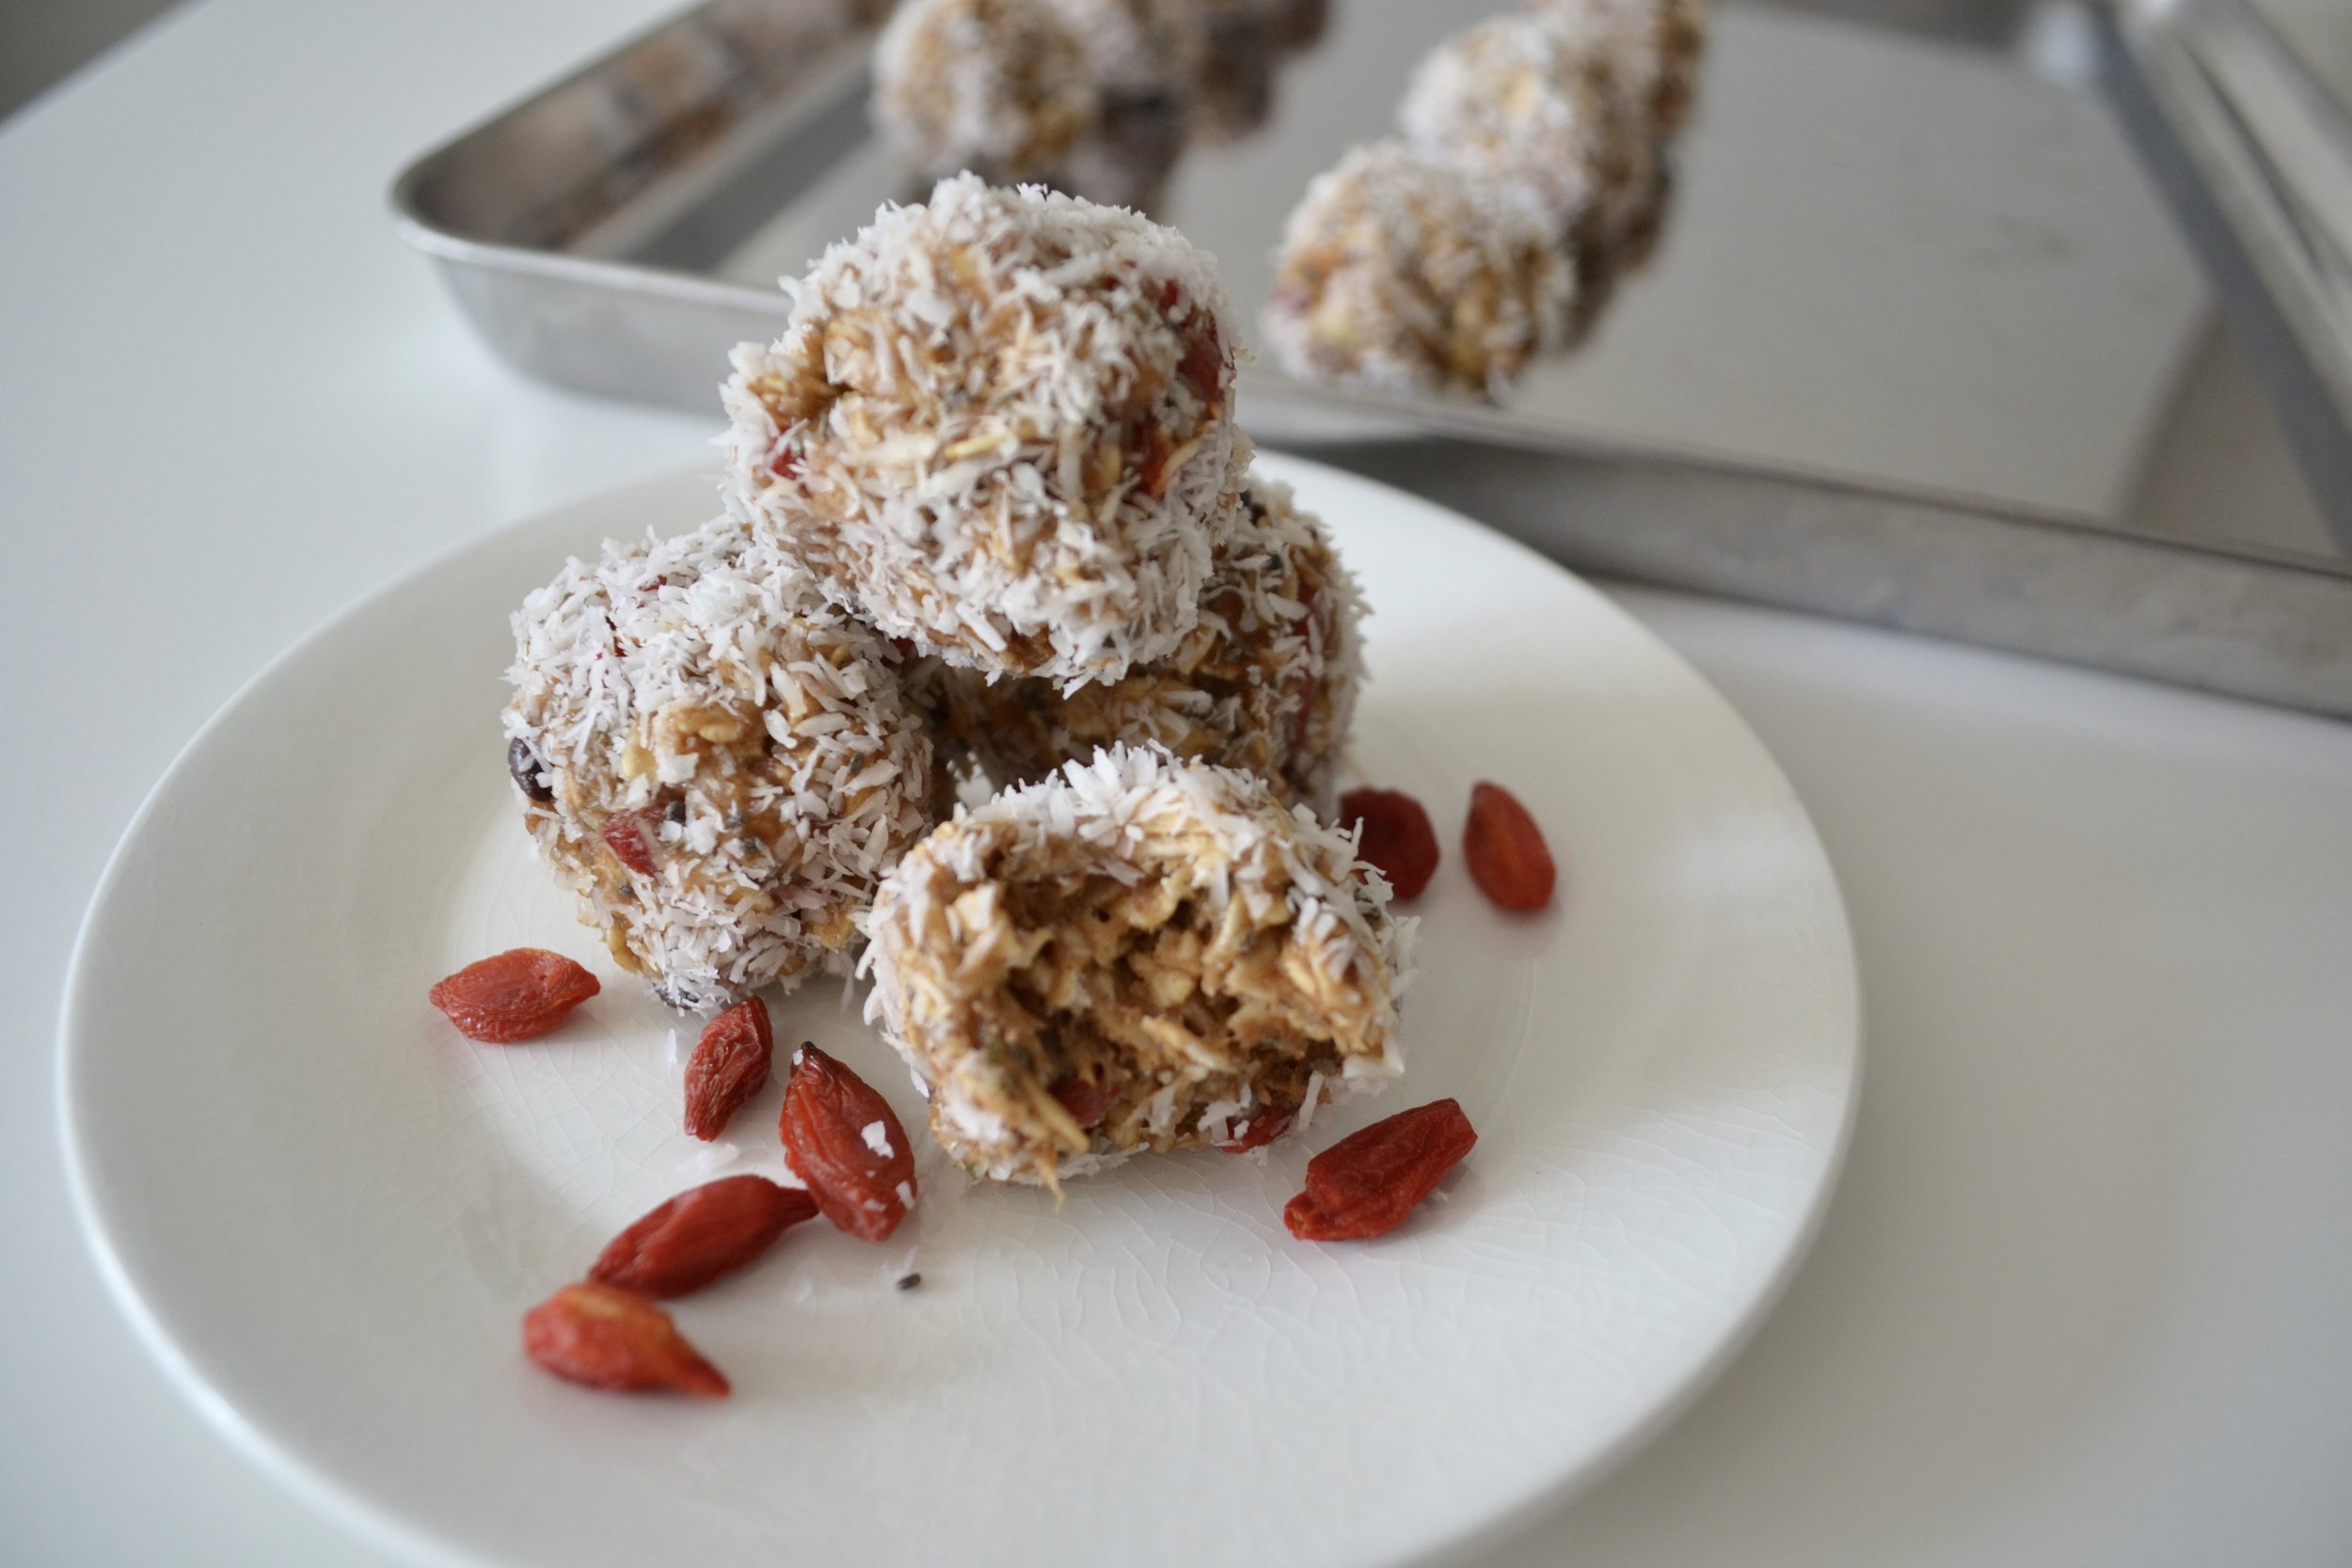
Grab & Go Protein Balls

by Nina Z


fullsizeoutput_1e7d.jpeg

All of us prioritize the time in our days differently. Whether you make time for meals or not, these little guys most definitely have a place somewhere in your day. They can be breakfast on-the-go (PERFECT for after that morning spin or yoga class) or they can be a mid-afternoon snack when you’re feeling snack-y. Or both, I’m not judging. In fact, I’ll be so proud of you for getting some healthy fiber and protein into your day.

Protein Balls*:

  • 1 large banana, mashed

  • 1/3 cup peanut butter

  • 3/4 cup rolled oats (not quick cook)

  • 1 TBS hemp seeds

  • 1 TBS chia seeds

  • 1 TBS dried goji berries

  • 1 TBS mini chocolate chips

  • 1 TBS maple syrup

  • 1/2 tsp cinnamon

  • 1/4 tsp salt

  • 1/2 cup + 1 TBS unsweetened coconut flakes, separated

Method:

On a large plate, pour 1/2 cup coconut flakes and shake carefully to make an even layer. Set aside.

In a large mixing bowl, combine all ingredients, and mix with a large spoon or spatula to thoroughly combine. Refrigerate mixture for 10 minutes to let it set.

Using a 1 TBS measure, scoop and roll mixture gently in your hands to create each ball, and roll in coconut flakes until evenly coated. Repeat, and line balls on a cookie sheet. When done, refrigerate balls for 15 minutes.

You can eat right away, or you can pack them away in the refrigerator or freezer. They’ll keep in the fridge 2-3 days, and you can store in the freezer for 1-2 weeks.

*This recipe was developed in partnership with Ilana Broad.

1 Comment

TAGS: howtoadultcookbook, snack, meal prep, mealprep, healthytreat, protein balls, ninaknowsfood, gluten-free, dairy-free, plant-based


August 8, 2019

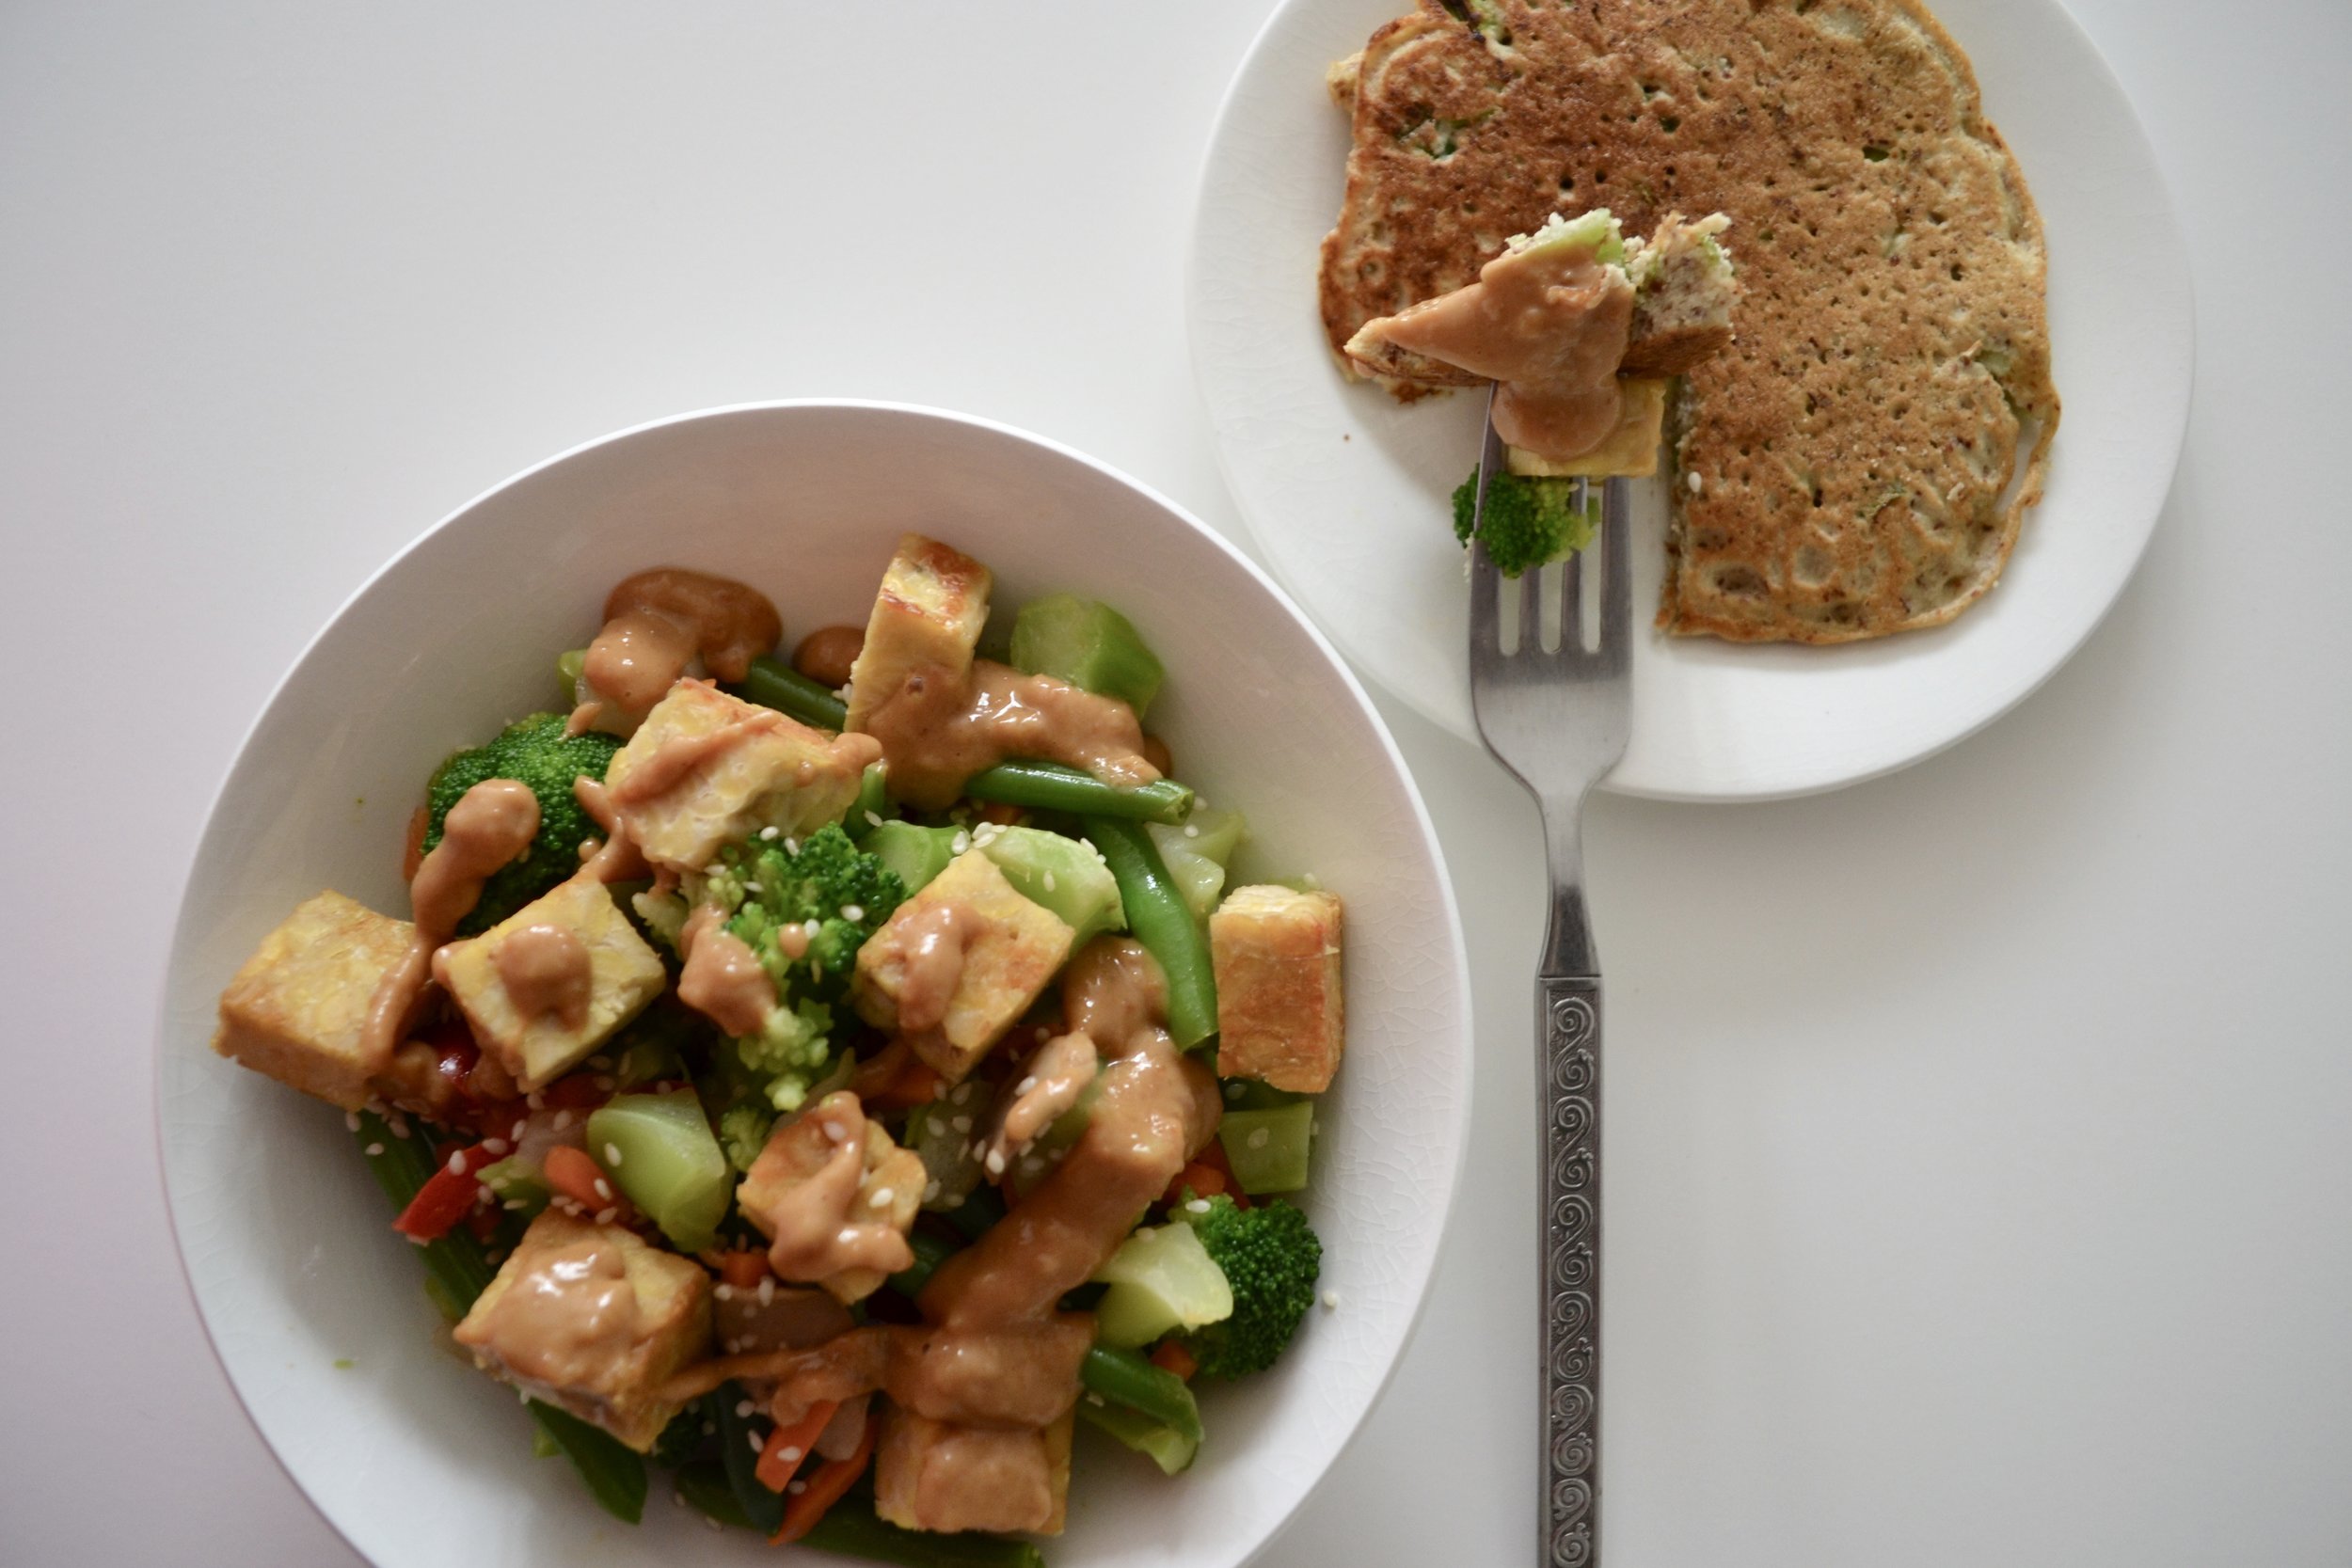
UPDATED: Tempeh Stir Fry, Scallion Pancakes & Peanut Ginger Sauce

by Nina Z


fullsizeoutput_1e67.jpeg

I’ve been thinking about these dishes since I posted them back in April because I wanted to be able to provide fully written out recipes, not just links to show you where my inspiration came from! I’ll definitely still do that, as I often find inspo from Instagram and the NYT Cooking section, but one of my goals with this blog is to be able to provide simpler, healthier versions of those dishes.

So, this post is just that. I revisited these dishes and made tweaks that I think will really help! I switched from using tofu to tempeh because I find tempeh easier to prepare & cook, and it’s also fermented soy, which my body handles better.

Also, this peanut sauce… you won’t be able to stop yourself from just eating it with a spoon and nothing else.

fullsizeoutput_1e62.jpeg

Scallion Pancakes:

  • 2 large eggs

  • 1/2 cup milk of your choice (if using nut milk, use unsweetened/unflavored)

  • 1 TBS low-sodium soy sauce or shoyu

  • 1 inch piece fresh ginger, chopped finely

  • 1 1/4 cup almond flour (or flour of choice)

  • 1/4 tsp baking powder

  • 1/2-1 bunch scallions, chopped (if you love scallions like me, you’ll use entire bunch!)

  • 1-2 TBS coconut oil, for cooking

Method for Scallion Pancakes:

Whisk eggs, milk, soy sauce and ginger together in a large mixing bowl. Add in flour, baking powder and scallions, and mix with a spatula until thoroughly combined.

Heat skillet over medium heat, and melt 1 TBS coconut oil to start. Using a 1/3 cup measure, scoop pancake batter onto skillet. Cook for 2-3 minutes on one side, and flip. You’ll know when it’s ready to flip because little bubbles will form on the edges of the pancakes. Repeat, and remove pancakes from skillet once cooked all the way through.

You may need to re-grease the pan, if your stovetop gets really hot, really quickly like mine does, so that’s why I included the extra 1 TBS of coconut oil in the ingredients.If you’re using 1/3 cup measure, you’ll be able to make 6-7 large pancakes. Totally up to you, but using a measuring cup ensures the same sized pancake every time!

Set aside with foil lightly covering until you’re ready to serve dinner.


Peanut Sauce (inspired by NYTCooking):

  • 3 TBS creamy peanut butter

  • 1 TBS rice wine vinegar

  • 3 tsp low-sodium soy sauce or shoyu

  • 3 tsp maple syrup

  • 1 tsp ground ginger

  • 1/4-1/3 cup water

  • 1 tsp Sriracha (optional)

Method for Peanut Sauce:

In a small mixing bowl, pour in peanut butter, vinegar, soy sauce, maple syrup, ground ginger, and optional Sriracha. Add in a little of the water, mix slowly with a spoon, and continue to add water until desired consistency, which should be thick but pourable. This makes enough to serve 2, with some for leftovers!

Set aside until you’re ready to serve.


Tempeh Stir Fry:

  • 1 package tempeh, cut into bite-size pieces

  • 1 package frozen stir fry veggies, thawed a little bit

  • 1 TBS sesame seeds

  • Salt to taste

  • 2 TBS coconut oil, for cooking

Method for Stir Fry:

In a large pan, heat coconut oil over medium heat.

Add tempeh to pan, and cook to brown on all sides, about 8-10 minutes. Add in veggies, sesame seeds and salt, and toss. Cook everything together for another 5-7 minutes, until veggies are cooked and a little browned. Depending on how hot your stovetop gets, this could take longer.

Serve stir fry, pancakes and peanut sauce together and enjoy a healthified takeout meal!

Comment

TAGS: ninaknowsfood, dinner, healthy meals, weekdaymeals, weeknightmeals, gluten-free, dairy-free, mealprep, meal prep, takeout, healthy takeout, grain-free


August 5, 2019

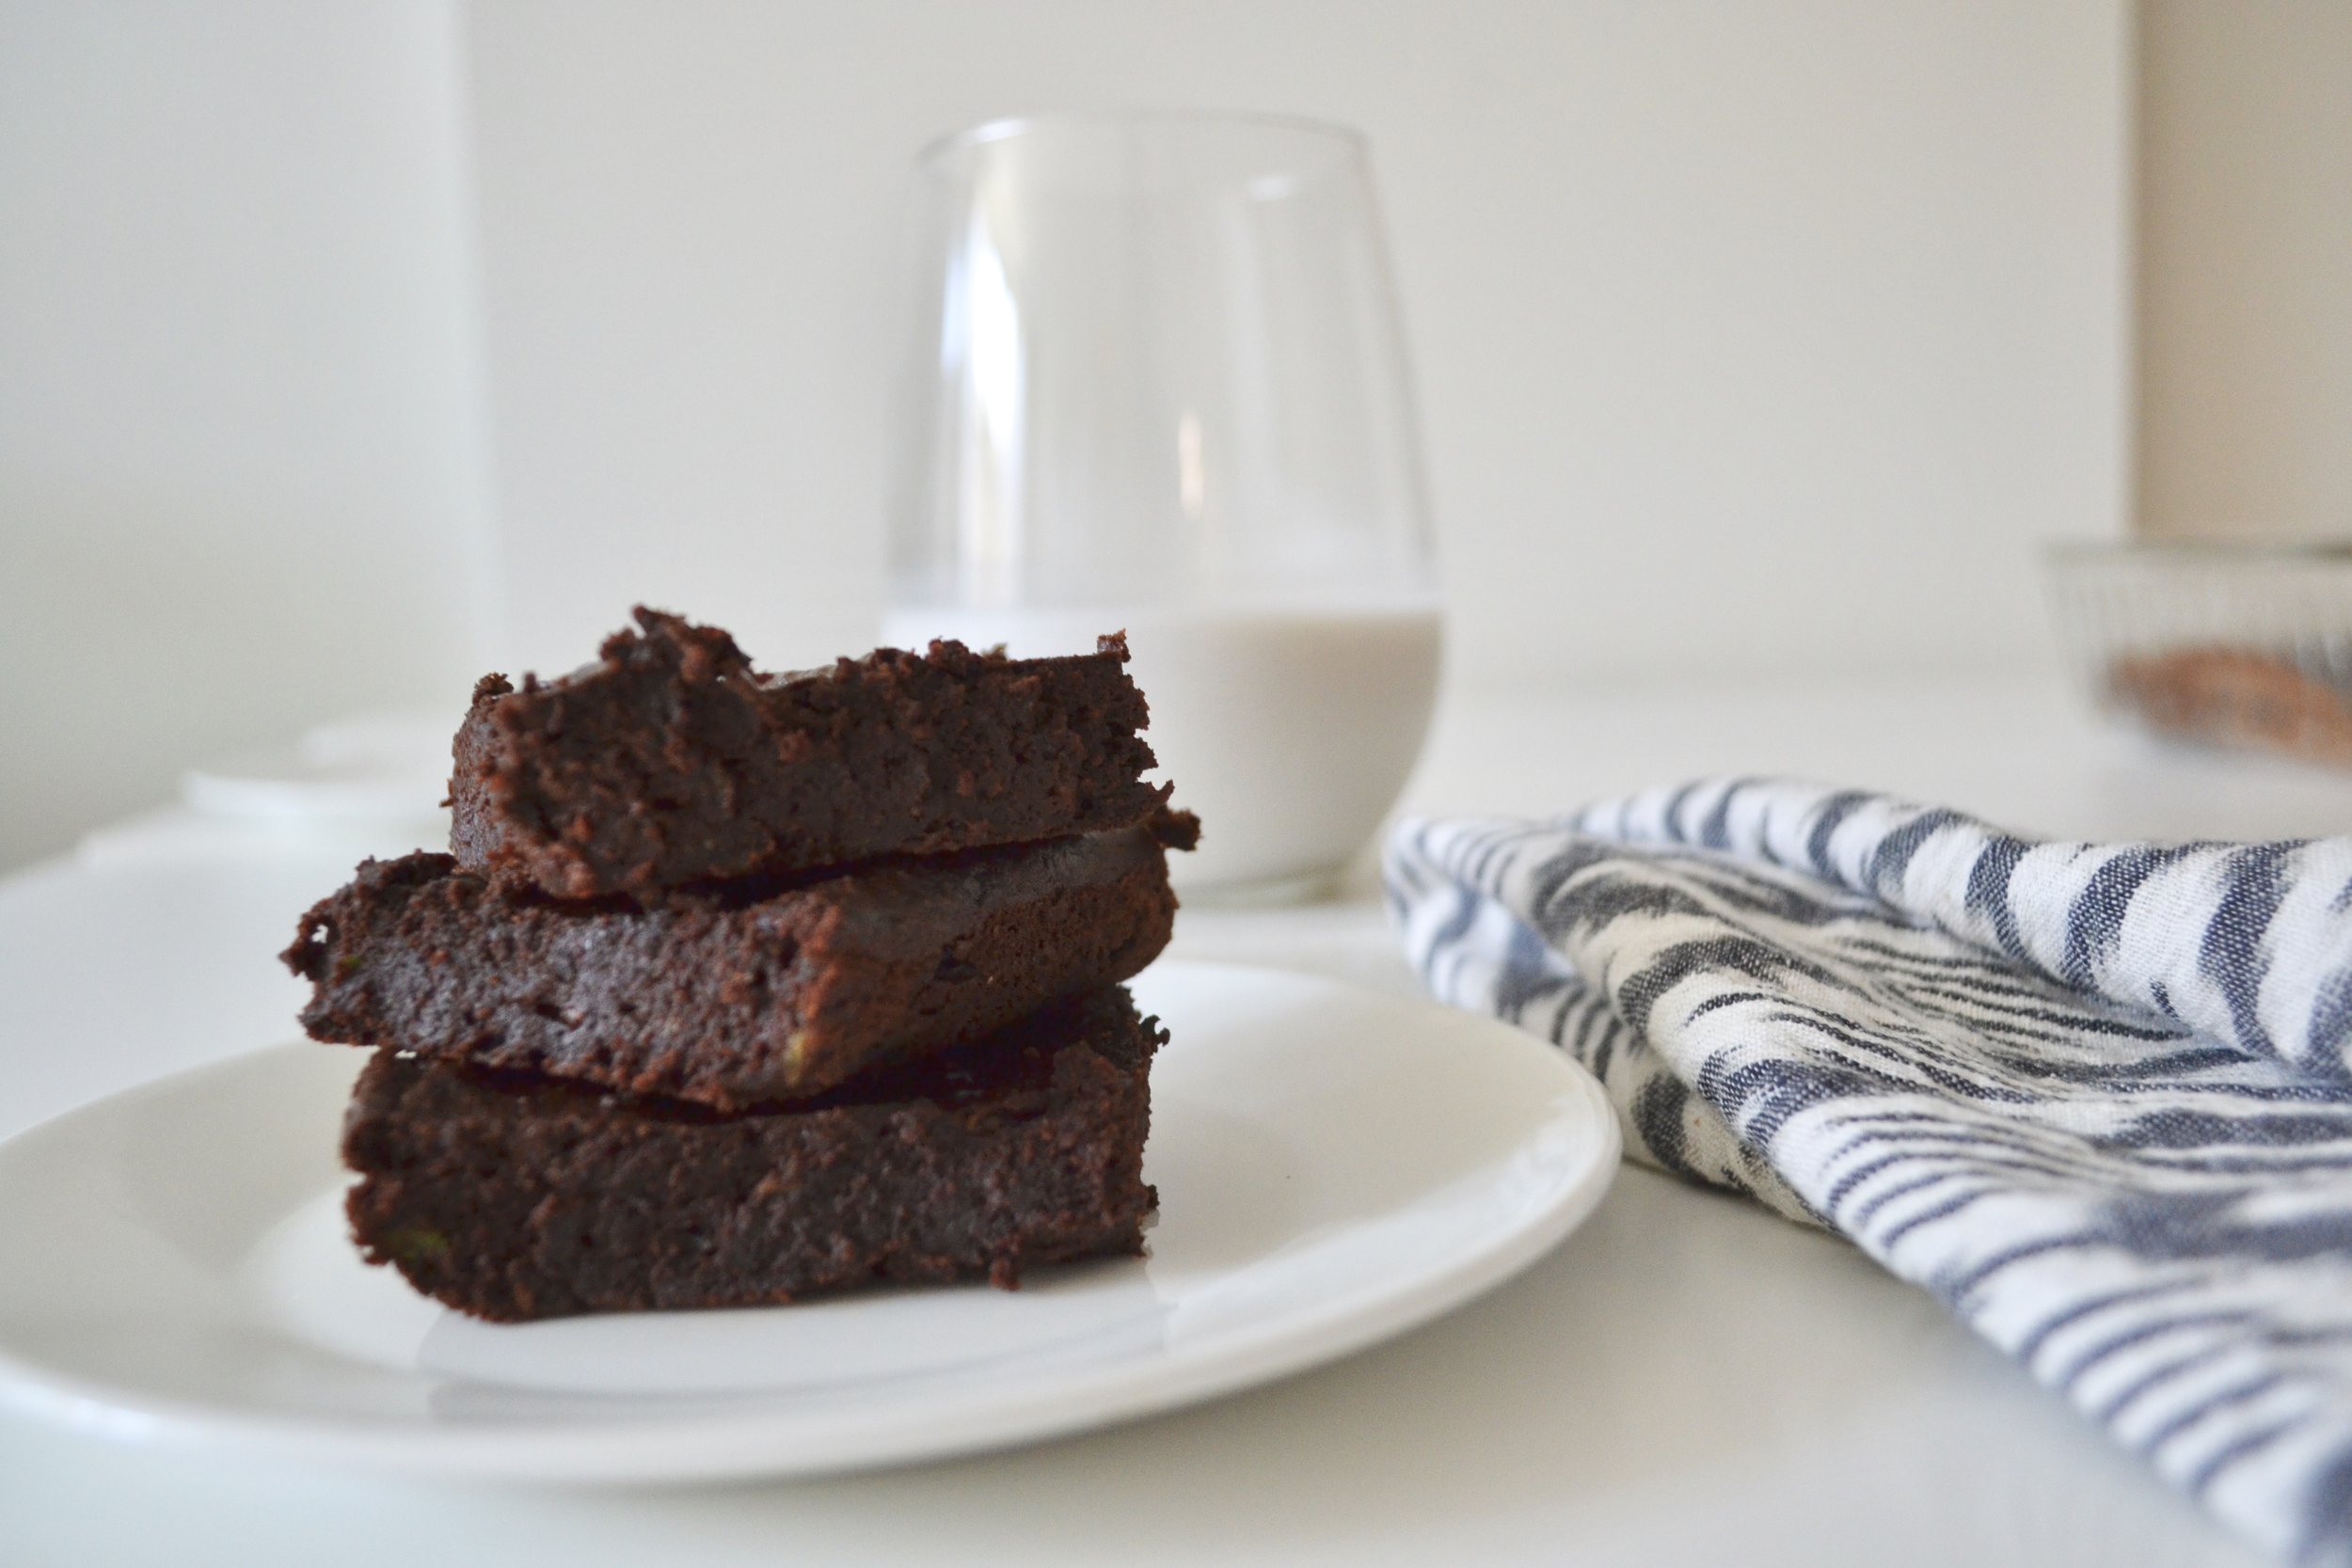
Better-Than-Ever Avocado Brownies

by Nina Z


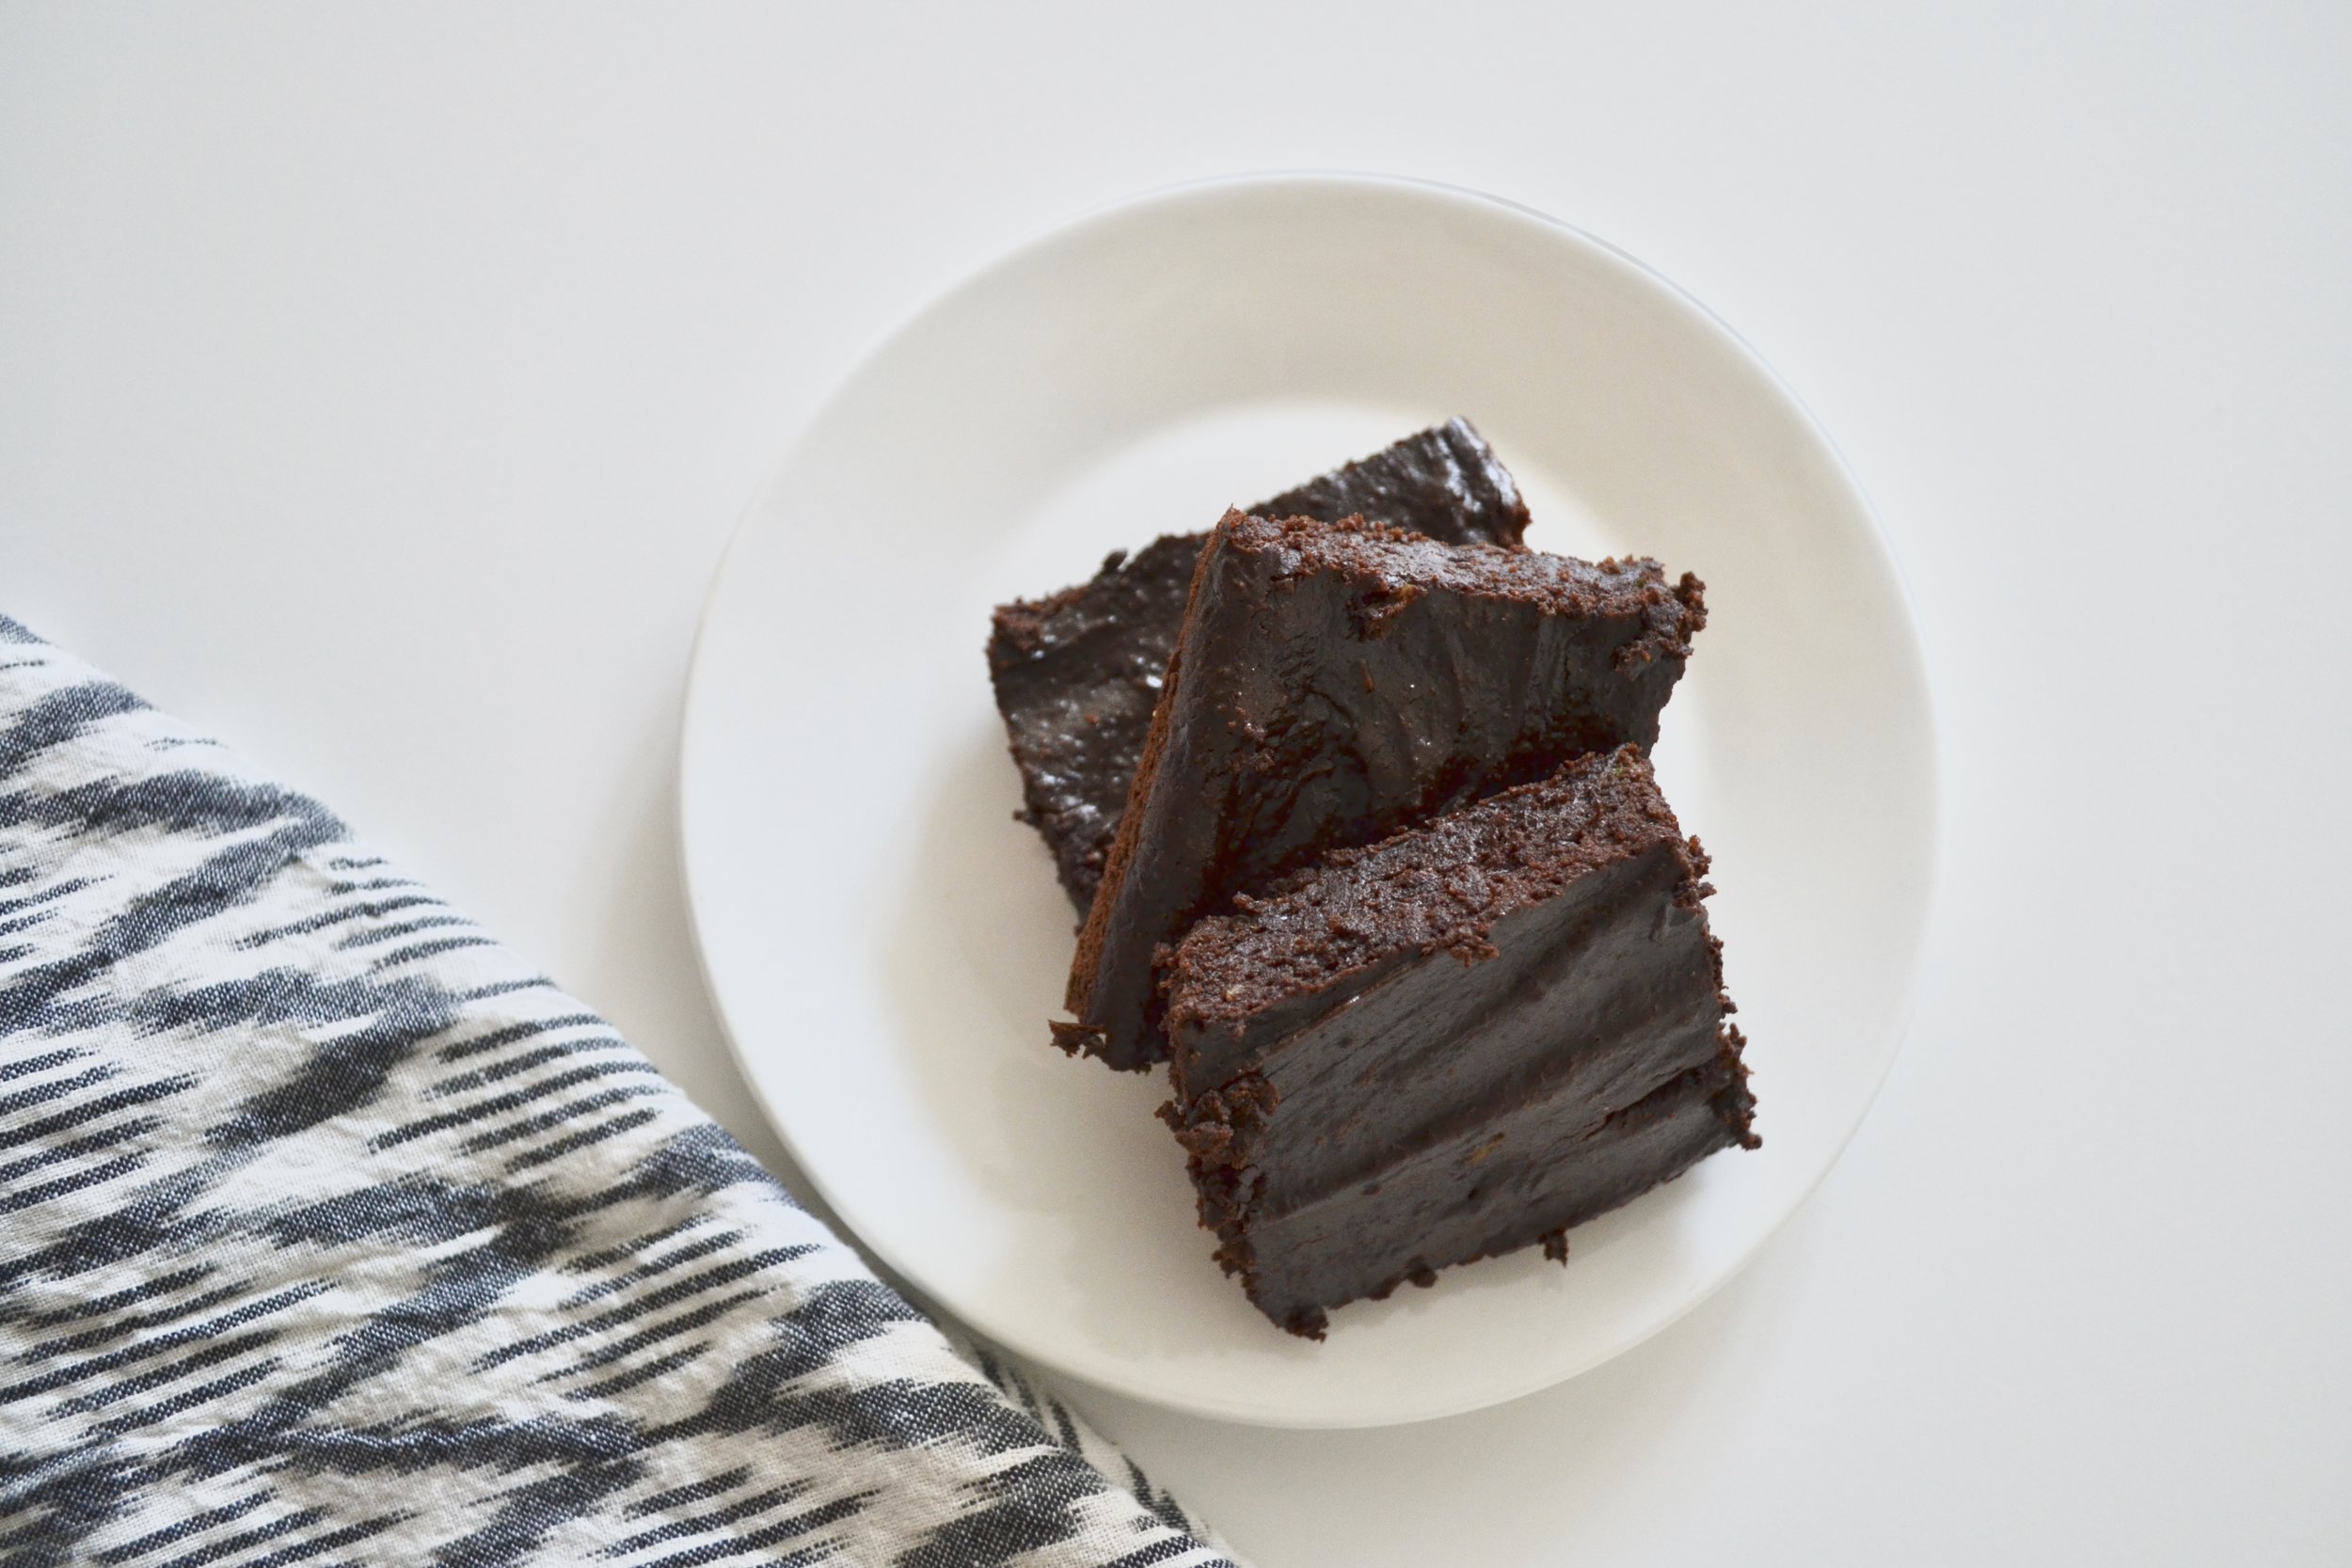
fullsizeoutput_1e5f.jpeg

As the #howtoadult cookbook slowly comes to life, I’ve been revisiting my recipes. Not only do they need to be delicious, but they need to be simple - no special ingredients you have to run to 3 different stores for, no complicated equipment, no fuss.

These brownies were an obvious shoe-in. If you’ve been following along over the years, you know I love taking traditional dishes, from dinners to desserts, to the healthier end of the spectrum. I also tend to keep my recipes dairy-free, and as of recently, many of my recipes are gluten-free to accommodate those who are gluten-sensitive.

While the original recipe is great, why not try to improve it? I was able to reduce the amount of sugar and provide a gluten-free option without sacrificing taste nor that fudge-y texture we all know and love in traditional brownies.

These brownies use avocado as the primary source of fat (instead of butter), dark chocolate and maple syrup for sweetness (instead of refined sugar), ingredients you can find in any grocery store, and best yet, you only need one large mixing bowl.

Here’s what you’ll need to make my improved Avocado Brownies:

  • 1 large avocado, mashed

  • 1 3.5-oz bar of dark chocolate (preferably 70% cacao or higher), melted

  • 2 eggs

  • 1 tsp vanilla

  • 1/3 cup maple syrup

  • 1/3 cup oat flour (or flour of your choice; oat flour is preferred & not difficult to find)

  • 1/4 cup cocoa

  • 1/2 tsp baking powder

  • 1/2 tsp salt

  • 2 tsp coconut oil, melted, for baking pan

Method:

Preheat oven to 350 degrees F.

In large mixing bowl, mash avocado and add in melted chocolate, eggs, vanilla and maple syrup. Whisk until completely combined - you may still see some avocado pieces and that’s OK.

In the same bowl, add in flour, cocoa, baking powder and salt. Using a spatula, mix slowly to prevent flour and cocoa from escaping the bowl. The mixture will be thick. Make sure you scrape all flour and cocoa off the sides of the bowl so the mixture is thoroughly combined.

In an 8x8 baking dish, pour coconut oil and spread evenly around the dish with a paper towel, including the sides. Pour in batter and spread evenly. Bake for 25-30 minutes, or until the middle is set. You can test with a toothpick to make sure it comes out clean.

fullsizeoutput_1e5e.jpeg
1 Comment

TAGS: ninaknowsfood, brownies, healthytreat, dessert, recipedevelopment, gluten-free, dairy-free


April 25, 2019

For My Plant-Based Friends: Scallion Pancakes & Tofu Stir Fry

by Nina Z


IMG-0327.jpg
IMG-0327.jpg

I like to say that the first thing I learned how to cook was pancakes. Not from scratch, but from the box, adding an egg, some milk, some oil. I was mesmerized at how they’d puff up on the skillet, and what a work of art it was to flip one without any splatter.

I also like to say that the first “real” thing I learned how to cook was stir fry. I was in middle school, and not in my own kitchen but a friend’s, we’d cube up tofu, chop some green peppers and onions, cook it in some oil, and then douse our stir fry with teriyaki sauce. While I have fond memories of this dish, I’ve since learned that there are many other ways to make stir fry… perhaps a bit healthier without the bottled teriyaki sauce, but I’m inclined to say that I wouldn’t be where I am today without this original dish.

It’s fitting that two of my “firsts” in the kitchen, and some of my favorites, come together for this super quick weeknight meal that also utilizes freezer ingredients and really, anything you have on hand that may be going bad soon.

See new post for updated scallion pancake recipe!

Here’s what you’ll need to make Tofu Stir Fry with Peanut Ginger Sauce:
Makes ~4 servings (you know I love me some leftovers)

Stir Fry:

  • 1 package firm tofu, drained completely & cubed

  • Literally any vegetables you want… my favorites include broccoli, bell pepper, onion, mushrooms, and snap peas. I buy bags of frozen stir fry mix to make this SUPER easy, but you can also use any vegetables in your fridge that may be going bad, or if you have any frozen vegetable, that works too. Seriously, the possibilities are endless and I’m really not here to tell you what veggies work in a stir fry because I just want you eat your veggies…

  • 1-2 TBS coconut oil, or another high-heat oil such as avocado oil. Stir fry is meant to be cooked over high heat, very quickly, so you want to choose an oil with a high smoke point, meaning it can be heated to a high temperature without smoking and burning off.


See new post for updated peanut sauce recipe!


Method:

In a large skillet over medium heat, heat oil until shiny. Drop in tofu and cook to your liking - it can be totally browned on all sides or it can be slightly browned. Add veggies and cook together until veggies are cooked through - ideally, they should be fork-tender. This should take about 10 minutes or so!

Serve alongside scallion pancakes and fresh peanut ginger sauce (I could eat this by the spoonful).

Comment

TAGS: ninaknowsfood, weekdaymeals, weeknightmeals, pancakes, healthy meals, meal prep, mealprep, recipedevelopment, plant-based, vegetarian, dairy-free, meat-free, leftovers, summer


July 8, 2018

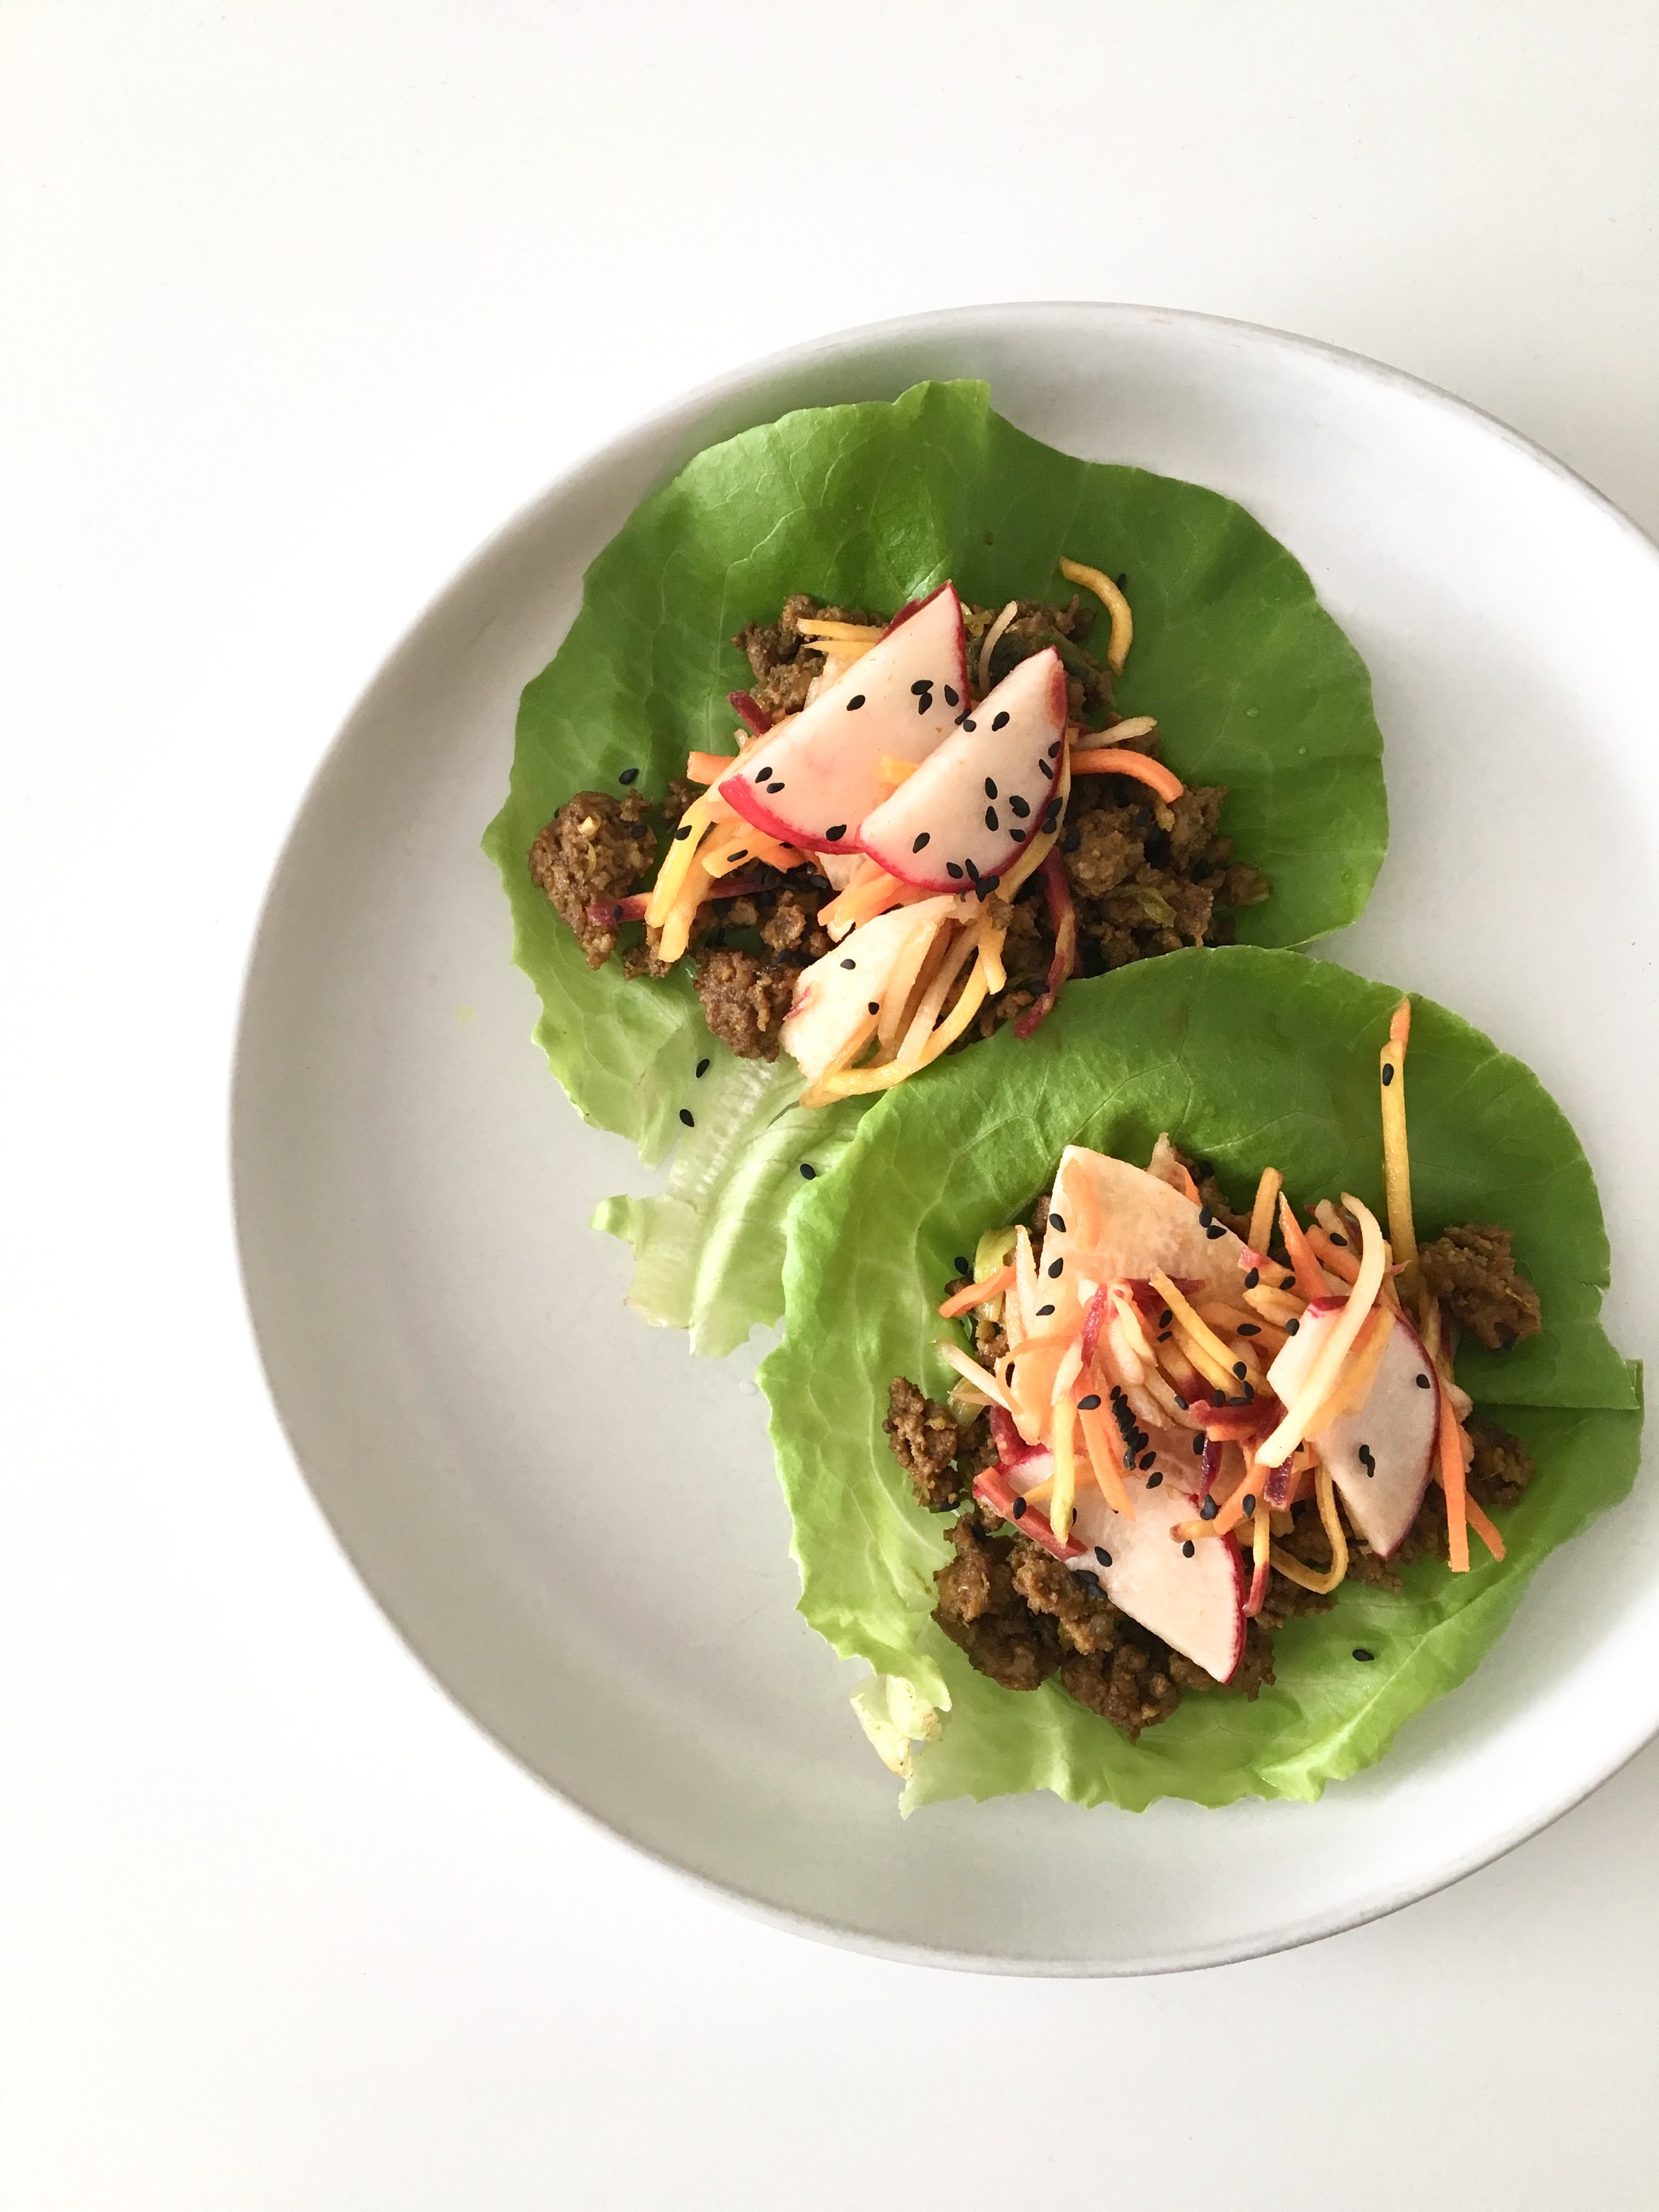
The Instagram Poll Has Spoken: Spiced Beef Lettuce Wraps

by Nina Z


IMG-8833.jpg
IMG-8833.jpg

Me again, emerging from the heat wave that took over NYC last week and feeling motivated to spend time over a hot stove/in a hot little kitchen. After the most amazing day exploring Brighton Beach & Coney Island yesterday, all I wanted to do was bring back that fresh, summer feeling back into my meals. 

I took to Instagram to see what you wanted to see & eat—I offered one vegan option and one not-vegan option, and while the non-vegan option won, I'm still going to provide both recipes!

I'm not vegan—I've found that eating some quality meat & fish is best for my body & for feeling my best—but I do try to eat lots of plant-based meals during the week. But, not this week ;)

*Update July 2020: In an effort to use more inclusive language, I have removed some elements of this recipe including specifying the ingredient “grass-fed and finished beef.” This beef option may not be accessible for everyone, nor is it necessary to cook and enjoy this dish. I aim to have my recipes be accessible for everyone, no matter their access or lack thereof to certain ingredients. I also want to share that many of my recipes are inspired by Asian cuisines. I use many spices that originate in Asian cuisines - namely ginger, chilis, turmeric, coriander - and I am in awe of their versatility in so many different types of dishes. For this recipe in particular, I acknowledge that lettuce wraps are a common dish found in Chinese and Thai cuisines in particular, and my recipe is inspired by the many lettuce wraps I’ve eaten over the years. I will continue to review the recipes on this blog to make sure I am using inclusive language, both as it relates to the ingredients and how I was inspired to create the recipe.

Here's what you'll need to make these beef lettuce wraps with sweet & spicy slaw:
[makes 3-4 servings, if you're measuring about 1/2 cup beef per person, or ~4oz]

Beef Filling:

  • 1 lb ground beef

  • 4-5 green onions, chopped

  • 1 garlic clove, chopped

  • 1 TBS coconut oil

  • 1/2 tsp ground coriander

  • 1/2 tsp ground turmeric

  • 1/4 tsp garlic powder

  • 1/4 tsp ground ginger

  • 1 tsp Sriracha [or more to taste]

  • Salt & pepper to taste

Sweet & Spicy Slaw Topping:

  • 1 cup shredded carrots [I bought pre-shredded, it's so much easier]

  • 1/2 cup thinly sliced jicama

  • 1-2 large radishes, thinly sliced

  • Juice of 1 small lime

  • 1 TBS tamari [or soy sauce]

  • 1 tsp Sriracha

  • 1 tsp maple syrup

Lettuce Wraps:

  • Romaine hearts or butterhead lettuce - these provide the “wrap” or “cup” to hold all the filling!

Method:

In a large sauté pan or skillet over low-medium heat, sauté green onions and garlic until soft, about 2-3 minutes. Add in ground beef, and break it up with your cooking spoon [I like to use wooden spoons] so that it can cook evenly in the pan.

Add in spices, Sriracha, and salt/pepper to taste, mixing it in with the beef to make sure it's thoroughly combined. Continue to break up the meat as it cooks. It will take about 10-15 minutes, depending on your stove top, to get the meat completely browned & cooked through. 

While the beef cooks, you can prepare the slaw ingredients. In a small mixing bowl, add in all slaw ingredients and toss with tongs or a spoon to coat evenly. Make sure you taste it—you can add more Sriracha or more maple syrup, depending on how spicy or sweet you like it!

When the beef is done cooking, turn off the stove and take the pan off the heat to let the mixture cool a bit [you can simply move the pan to another burner]. Rinse your lettuce and pat dry with a paper towel [no one likes a soggy wrap].

Lay down a couple of pieces of lettuce on your plate, fill with beef & top with slaw, and garnish with black sesame seeds or any other topping—you can try avocado, chopped cashews, or more Sriracha and tamari!

Hungry yet? Raise your hand if you can't wait for dinner tomorrow!

Comment

TAGS: ninaknowsfood, dinner, dairy-free, weeknightmeals, weekdaymeals, healthy meals, meal prep, recipedevelopment, howtoadultcookbook, gluten-free, eat local, sundays


April 13, 2018

Black Sesame & Tahini Bread For The Win

by Nina Z


IMG-8239.jpg
IMG-8239.jpg

I'm probably not the only one whose Instagram feed is mostly food, and it's honestly where I get a lot of inspiration for weeknight meals, weekend baking projects, and all the snacks in between. 

I'm such a sucker for banana bread, but when I saw this swirled sesame tea cake... mind. blown. First, it's gorgeous. And second, it utilizes an ingredient that I usually have in my fridge but I almost never use!

Tahini is ground sesame, this beautiful light golden paste that's nutty and savory. It's also one of the main ingredients in hummus, giving it it's rich flavor.

If you've read any of my blog posts or Instagram posts, you know I'm impatient and can't be bothered with all the extra bowls & baking steps. And so, this version of this bread was born!

IMG-8237.jpg

Here's what you need to make my Black Sesame & Tahini Bread (makes one 8 1/2"x4 1/2" loaf):

Dry:

  • 1 1/2 cups whole wheat (or AP) flour
  • 1 3/4 tsp baking powder
  • 1/4 tsp baking soda
  • 1 tsp salt
  • 1/2 tsp each: cinnamon, nutmeg, ground ginger

Wet:

  • 1/2 cup coconut (or full fat Greek) yogurt
  • 1/2 cup tahini
  • 1 cup sugar, plus extra for sprinkling
  • 2 large eggs
  • 1 tsp vanilla extract
  • 1/2 cup olive oil
  • 1 1/2 tsp sesame oil

Other:

  • Black sesame seeds for sprinkling
  • Ghee (or nonstick oil spray) for pan

Instructions:

Preheat oven to 350 F. 

Coat bread loaf pan with nonstick oil spray OR thin layer of ghee. Then, line pan with parchment paper, so that paper comes up above the sides of the pan. Once more, coat parchment paper with nonstick spray OR thin layer of ghee. Sprinkle sesame seeds and sugar to coat parchment liner, tapping to evenly coat pan liner. 

In a large mixing bowl, whisk together all dry ingredients. In a small mixing bowl, combine yogurt and tahini. It might separate a little bit, but mix it until it's thoroughly combined. 

In another large mixing bowl, with a hand mixer (or standing mixer if you have one), beat sugar, eggs, and vanilla together until pale in color and thickened. Add in olive oil and sesame oil and beat until thoroughly combined.

Add dry ingredients and yogurt & tahini mixture alternately to the bowl with the wet ingredients (sugar, eggs, and vanilla)—dry, then yogurt & tahini mixture, then dry, then mixture, ending with dry.

Pour batter into the bread loaf pan, and sprinkle the top with more sesame seeds and sugar.

Bake for 55-65 minutes, until golden brown and no longer gooey in the center. Lift parchment & bread together out of the pan to allow to cool.

Serve warm topped with coconut yogurt & berries, or slathered with almond butter, or grab a slice straight out of the bread loaf pan (go ahead, no one's judging).


Adapted from bon appetit's swirled sesame tea cake.

Comment

TAGS: baking, ninaknowsfood, dairy-free, weekends, dessert, homemade, cooking, healthytreat, recipetesting, recipedevelopment, bonappetitmag


March 12, 2018

The Ultimate Breakfast Hack: Frozen Fruit Baked Oatmeal

by Nina Z


IMG_8064.JPG
IMG_8064.JPG

I try to buy local, in-season produce when I can, but last-minute plans and little energy after a long day of work and a post-work yoga class can easily sabotage my efforts to use fresh produce in the proper amount of time. While exaggerated, that meme of the avocado that's ripe at 6:00pm and rotten at 6:02pm explains my frustration of buying and using fresh produce, especially fruit!

Life hack? Stock up on frozen staples for future meal-prep ease! Buy frozen fruits like berries, and veggies like peas and broccoli florets. I love adding frozen berries to smoothies and frozen peas to any stew-like dish I make. Frozen produce helps make meal prep easier because you're not running to the grocery store for those select, fresh items. You'll save a little money too, as frozen produce can be purchased at any time during the year, and fresh, out-of-season produce is often quite expensive. 

By no means am I suggesting you replace all fresh fruits and vegetables with their frozen counterpart. Fresh produce, when locally grown and in-season, contains important vitamins & minerals to support health. However, if you're in the middle of a long winter, grabbing frozen produce can help save money and still add some of those vital nutrients into your diet, like vitamin C to ward off that pesky cold.

Here's what you need to make my Mixed Berry Baked Oatmeal (makes 4-6 large breakfast servings)

Wet:

  • 1 ripe medium banana
  • 2 cups frozen, mixed berries, split into 1 cup portions
  • 1/4 cup maple syrup
  • 1/2 cup almond milk (or nut milk of choice)
  • 1 teaspoon vanilla extract
  • 2 eggs

Dry:

  • 2 cups rolled oats
  • 1/2 cup coconut flour
  • 1/4 cup unsweetened shredded coconut
  • 1 teaspoon cinnamon
  • 1 teaspoon baking powder
  • 1/2 teaspoon sea salt

Instructions:

Preheat oven to 350 degrees F. Grease an 8x8 baking dish with ghee (you can also spray non-stick cooking oil) and set aside.

In a blender or food processor, puree banana, 1 cup frozen berries, maple syrup, almond milk, and vanilla until smooth. Pour into a large mixing bowl. Add eggs and whisk until thoroughly combined.

Add in all dry ingredients—oats, coconut flour, shredded coconut, cinnamon, baking powder, salt—and mix until thoroughly combined. Finally, add in remaining 1 cup of frozen berries and mix until they're evenly distributed throughout mixture.

Pour mixture into baking dish, making sure mixture is level. Bake for 35-40 minutes, until edges are slightly browned and middle is no longer soft—you can lightly touch top of oatmeal to determine if it's still "gooey" inside.

Serve immediately for a sweet snack, topped with coconut yogurt or a scoop of almond butter, or store in air-tight containers for your weekly breakfast meal prep. Oatmeal will last 3-5 days in the fridge.

Comment

TAGS: breakfast, oatmeal, weekdaymeals, howtoadultcookbook, dairy-free, gluten-free, frozen foods, ninaknowsfood, strawberries, blueberries, baked oatmeal, brunch, meal prep


November 19, 2017

A dish you may have grown up with...

by Nina Z


IMG_7455.JPG
IMG_7455.JPG

It's no secret that I get happier as the weather gets colder. Two weekends spent hiking in the Berkshires air kicked off my favorite season, filled with friends and lots of food.

fullsizeoutput_1d1f.jpeg

Sharing food with others is why I love to cook.

Thanksgiving is really the only holiday I get excited about cooking for—my mom and I plan the menu weeks in advance, wondering how we can tweak a dish from the previous year to make it better (healthier) or what should stay exactly the same.

This time of year, not only are we gearing up for our family Thanksgiving dinners, but Friendsgiving dinners as well. More often than not, Friendsgiving is potluck-style, giving you the chance to either showcase your mom's famous sweet potato casserole, or show how great you are at pointing at a babka from across the bakery counter.

fullsizeoutput_1cfb.jpeg

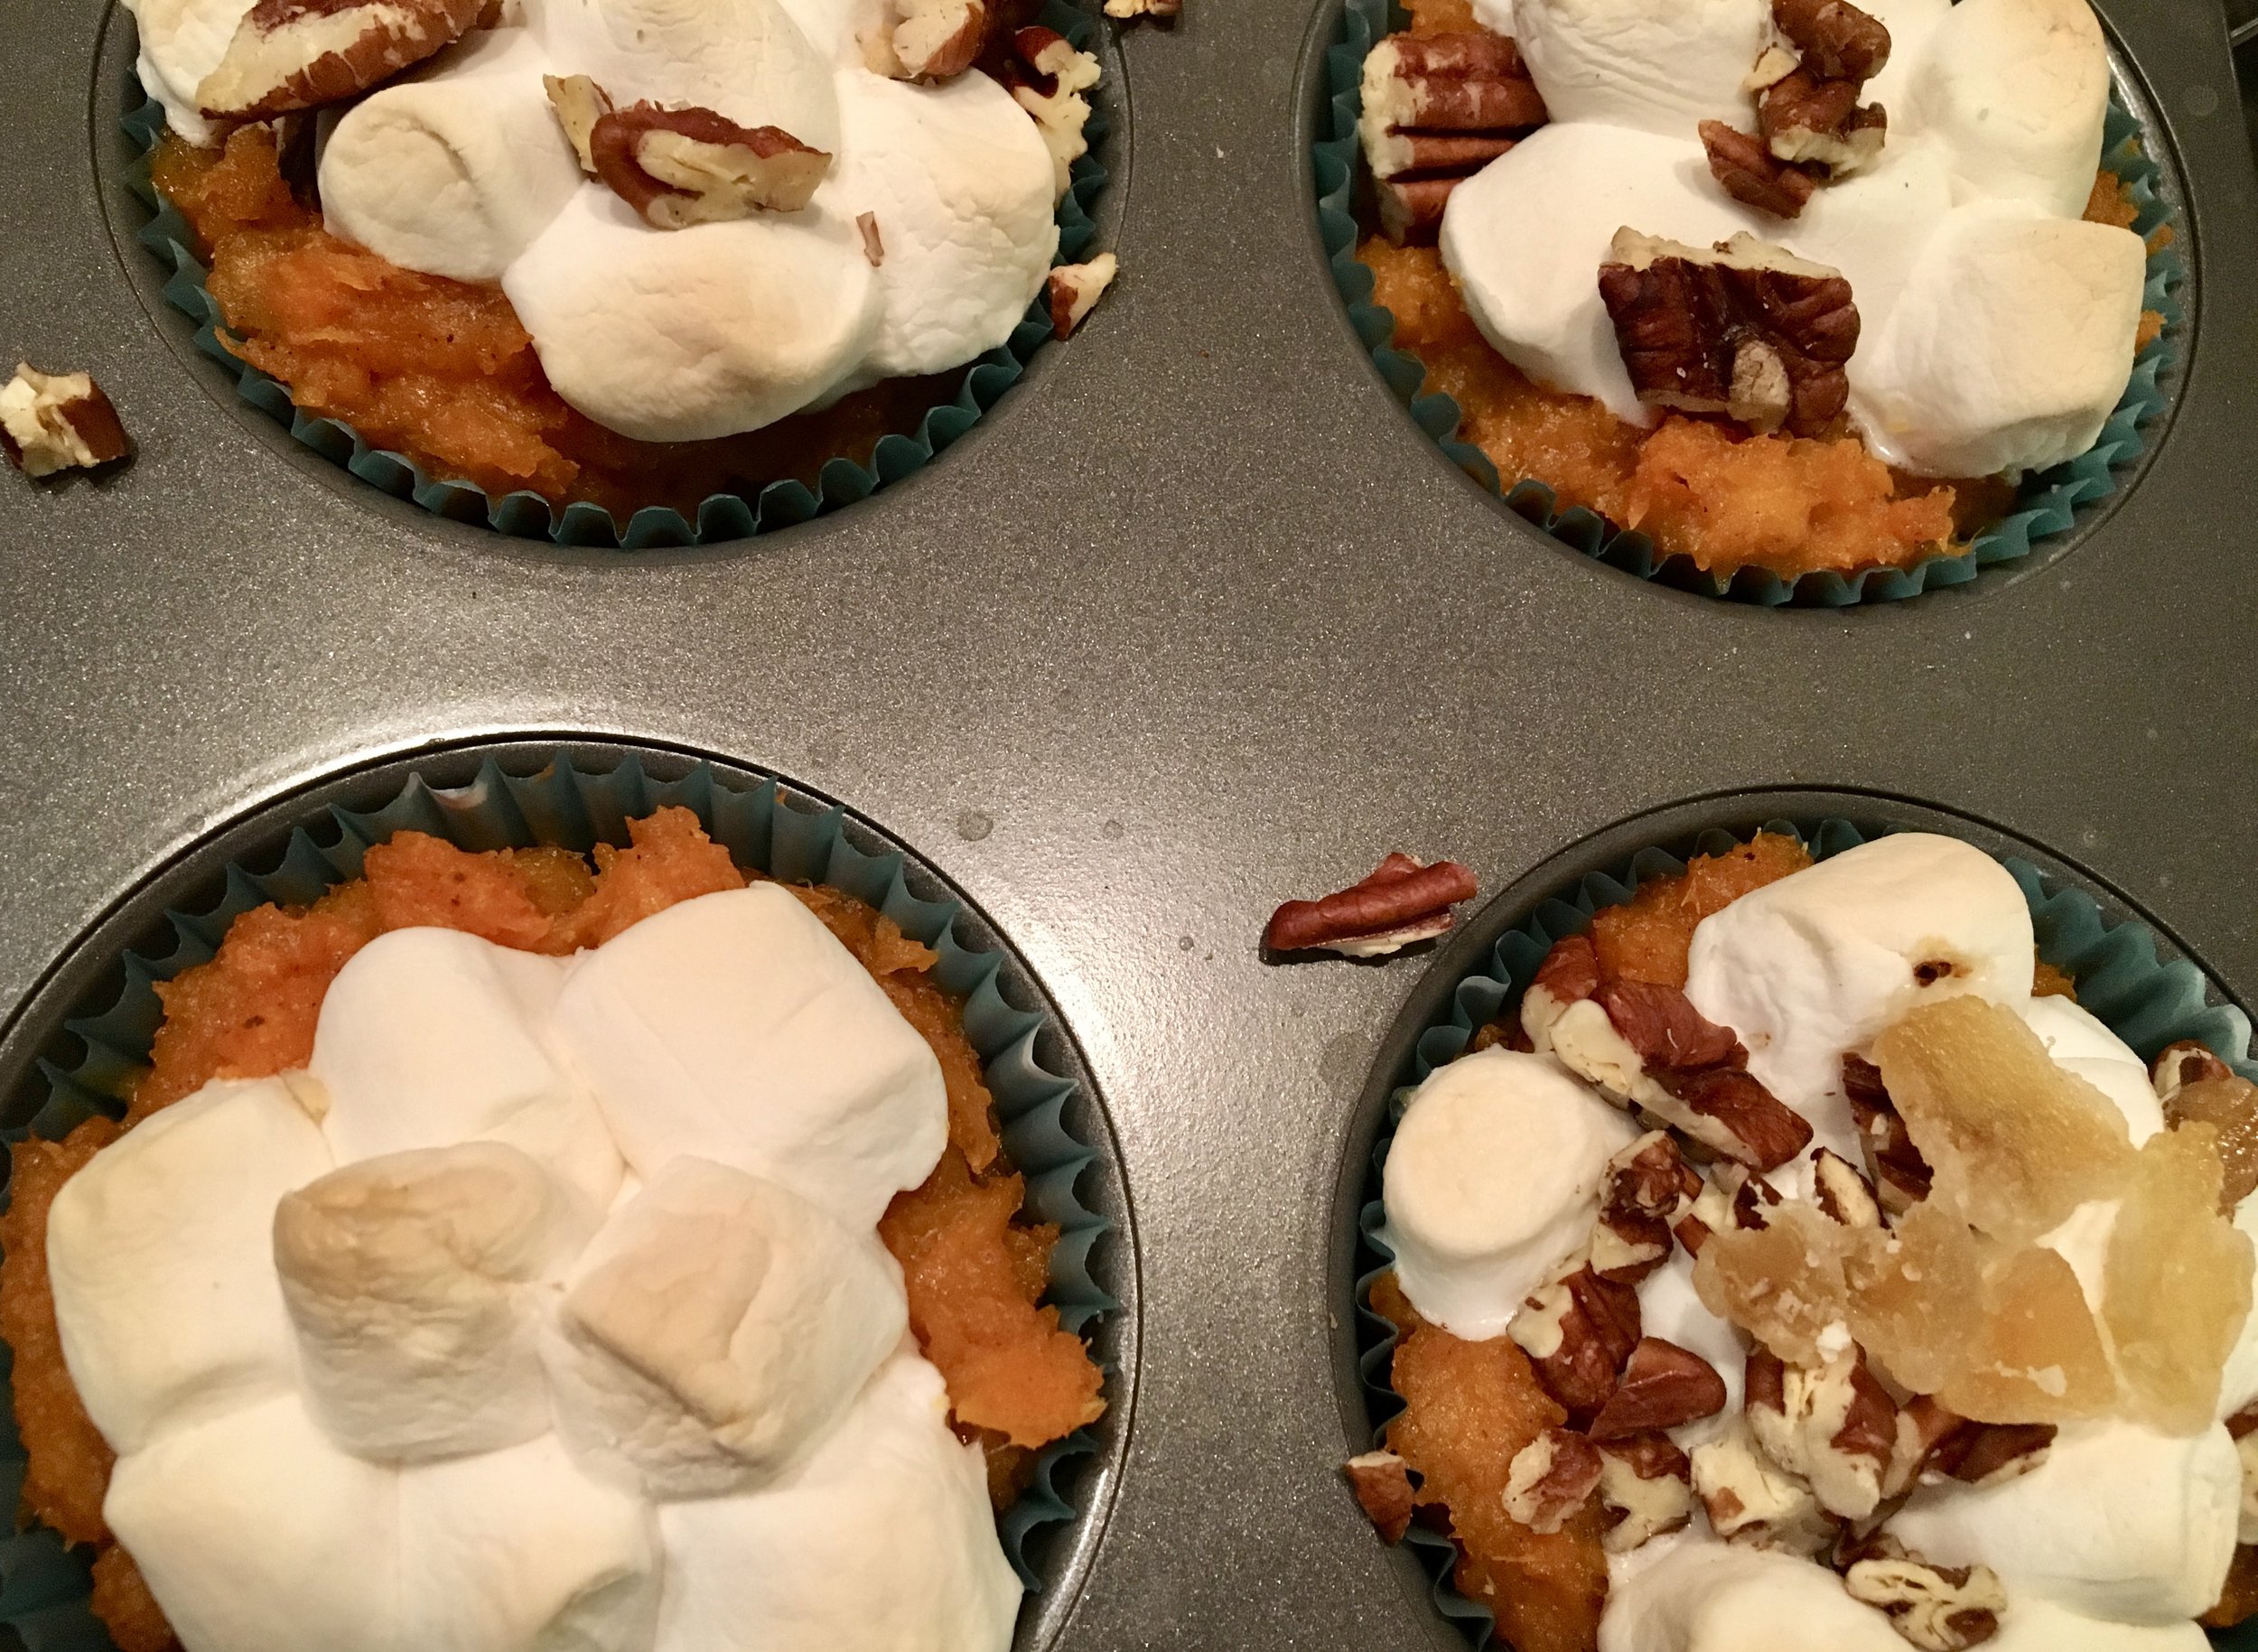
Chances are you've had some variation of sweet potatoes with marshmallows growing up. Perhaps you tried to scoop up only the toasted marshmallow topping. This dessert-as-sidedish conjures up extreme nostalgic feelings and in the spirit of the impending holiday, the #howtoadultcookbook ladies are here to give you a sweet twist to this classic Thanksgiving item.

Here's what you'll need to make Mini Sweet Potato Casseroles - makes 10-12 muffin-sized casseroles:

  • 4 large, or 5-6 medium-sized sweet potatoes—boiled, peeled & mashed
  • 1/4 cup coconut oil
  • 1/4 cup maple syrup
  • 1/2 tsp nutmeg
  • 1/2 tsp ground ginger
  • 1/2 tsp cinnamon
  • 1/2 tsp salt
  • mini marshmallows (for topping)
  • chopped pecans (for topping)

Place sweet potatoes in a large pot of water—water should be covering sweet potatoes fully, with 1-2 inches of water above potatoes. Bring water to boil and boil sweet potatoes for 30 minutes. Remove sweet potatoes from pot, and place in large mixing bowl to cool (about 20 minutes).

Preheat oven to 350F.

While still semi-warm, peel sweet potatoes, discarding the skin and placing peeled sweet potatoes back in the large mixing bowl. Mash sweet potatoes until smooth.

Add coconut oil, maple syrup, nutmeg, ground ginger, cinnamon, and salt and mix until thoroughly combined (the coconut oil will melt from warm potatoes).

In muffin tins lined with cupcake liners, fill each liner completely with sweet potato filling. Make a little hole in the middle of each for toppings.

Bake for 15 minutes until mini sweet potato casseroles are hot and slightly browned on top. Remove from oven to sprinkle each with a few mini marshmallows and chopped pecans—cover the top of each mini casserole almost fully (you should still be able to see potato underneath). Place back in the oven and bake for another 15 minutes until marshmallows are slightly browned on top.

Remove from oven to serve each mini casserole as an individual portion.

Tip: Be careful, they'll still be quite soft so you may need to use a spoon to remove them from muffin tins.

Comment

TAGS: friendsgiving, thanksgiving, dairy-free, gluten-free, comfortfood, howtoadultcookbook, dinner, homemade, cooking, holidays


  • Newer
  • Older

Powered by Squarespace 6